Walkthrough for Solasta: Crown of the Magister covers information that aims to guide players by providing a detailed guide on how to complete various locations and main quests of the game. For guides on quests, click here, if you want to check an overview for a recommended progress path, you may visit our Game Progress Route page.
Journal
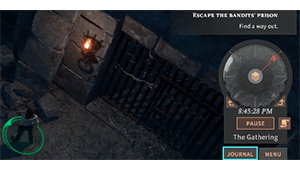
Click on the Journal button to open the quest log, which is at the bottom right of the screen. This will give you information on your current objectives, along with some useful context. Note that the Journal contains much more information than the quest log such as the Bestiary on Enemies and Factions.
Quest Log
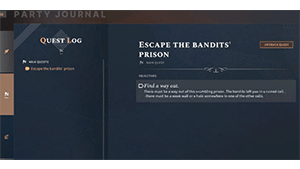
The log lists your current objective, which you must complete in order to move the quest forward. You may also have other, optional objectives. The log also gives you hints and context to help you understand the subtleties of your quest. Your successes and failures are all recorded here.
Solasta: Crown of the Magister Walkthrough
Secondary Quests
- History of Violence (The Wanderer Background Quest)
- Origins of the Crown
- Quest for Information
- Arwin Merton's Story
- Goblin Culture
- Visit the Local Scavenger HQ
- The Scavengers' Headquarters
- Convey the Scavengers' Message
- Lair of Filth
- Family Reckoning
- Sorak Relic
- Misaye's Birthday (Lowlife Background Quest)
- The Magister's Amulet
- The Arena
- The Escape from the Manor
- A Well-Ordered Room
- A Very Tempting Place
- Bitterroot's Treasure Map
- Shadow of the Defiler
- Ancient Knowledge
- Heritage of Distrust
- Family Reckoning
- Shadow of the Past
- The Collector
- Runs in the Family
- Angbi's Bones
- Hickory Corner Wood (Quest)
- Temple of the Lost Gods
- Wartime Treasure
- Honor Your Masters (Academic Background Quest)
- Apostasy (Acolyte Background Quest)
- Shadow of the Past (Spy Background Quest)
- The Nature of Evil (Philosopher Backgorund Quest)
- The Law is the Law (Lawkeeper Background Quest)
Information
- Previous: N/A
- Location: Gravekeep's Cask Tavern
- Next: Act 1: The Legacy Council
- Recommended Levels: ???
Video Playthrough
[video]
Maps
[maps]
Prologue Quests
Items
Consumables & Tools
- Potion of Healing
- Thieves' Tools
- Golden Key
- Liam's Heirloom
- Food Rations
Equipment & Ingredients
- Torch
- Arrows
Enemies
- Starving Wolf
- Grayback Wolf
- Orc
- Bandit Quartermaster
- Loan Shark
NPCs
- Lord Carran
- Liam
Full Prologue Walkthrough
Escape the Bandits' Prison
- Find a Way Out
- Leave the Cave
- Get Rid of the Bandits
- Recover Your Equipment From the Chest & Open the Door
- Tutorials: Character Selection, Basic Movement, Camera Controls, Quest Log, Journal, Crawling, Interactive Elements, Center on a Character, Interactive Elements, Climbing and Jumping, Jump Distance, Alternate Paths, Looting and Inventory Management, Stackable Items
Find a Way Out
The Prologue begins during the party conversation at the Graveyard's Keep Tavern. This sequence serves as a tutorial for basic Movement and Environmental Interactions. Exit the prison cell and reach the end of the corridor. You will receive a tutorial pop-up on character selection, movement, and camera controls. Continue forward and you will eventually also receive a tutorial pop-up on how to access your Journal and Quests logs in order to see your current and completed objectives. This is accessible at any time. You may access it by clicking on the "Journal" button located on the bottom right of your screen below the compass. Aside from Quests, your journal will also provide information on Factions, relationships, and will keep a log of your Adventure progress and enemies.
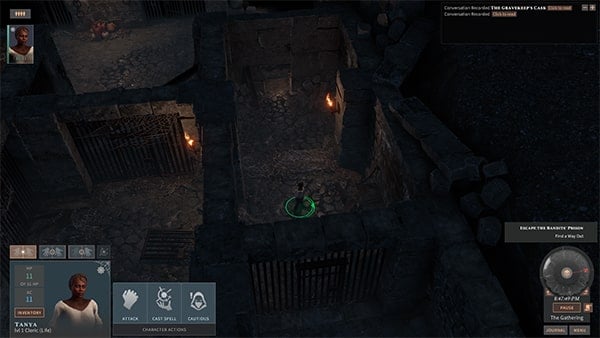
Enter the open cell gate to the right. It will be facing north. This is where you will trigger a Crawling tutorial. Crawl through the hole in the wall by clicking on the other side. Loot the basket directly in front of you to obtain your first light source, a Torch. Drag the torch to the primary slot to equip it. Keep an eye out on the torch duration, as it will eventually deplete. To check the duration of a Light Source, open your inventory, hover over the Item, and press "ALT" for more information. This applies to any Item you want to find more information on.
Reach the end of the corridor to prompt the Interactive Elements Tutorial. Interactive Elements are highlighted in the game. Interact with the highlighted section of the wall to clear a path out. Crawl through the hole again to leave the prison and enter the next area.
Leave the Cave
This will prompt the Climbing and Jumping tutorial. Click on your destination to Climb. These abilities are also affected by a character's Strength and proficiency with Athletics. This will determine Jump Distance or how many cells a character can climb or drop, making hard-to-reach chests easier for some characters over others. The tutorial states that although a character may not have the ability to jump across certain areas to reach some chests, there is usually an Alternate Path that can be taken to reach the chest. The chest in this area also has an Alternative path. Climb and jump over the rocks to get behind the wall of the chest. When you reach the wooden pillar, interact with it to push it over and create a path to the other side. This will bring you to the wall behind the chest. Interact with the highlighted block in the wall to remove it and crawl through the hole again to reach the chest. Loot the chest to obtain a Potion of Healing.
Get Rid of the Bandits!
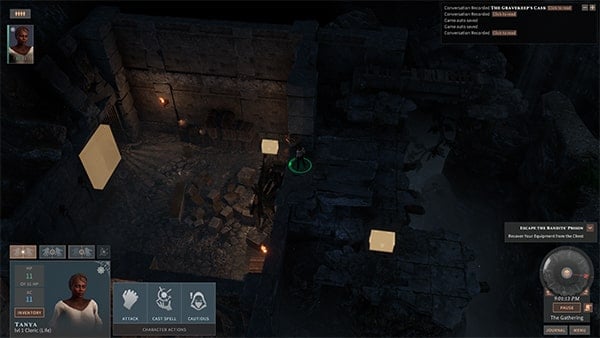
Crawl back through the hole and interact with the highlighted unstable wall to the left to push it over. The bandits will be on the other side. Pushing the wall over will cause the structure to fall and crush them. You have now gotten rid of the bandits. Enter the area to trigger the Looting and Inventory Management tutorial. This is a reminder to keep an eye on the overall total weight of the items you are carrying as this will affect the character and slow them down- a Condition called Encumbered. Your weight gauge is indicated by the Encumbrance bar. To save space in your inventory, stackable Items can be grouped together to only take up one space. A tutorial on stackable items will come after the Looting and Inventory Management tutorial to further explain.
Recover Your Equipment From the Chest & Open the Door
Once you dismiss the tutorial, drop down from the wooden platform and loot the chest in front of you to recover your equipment. Interact with the chest and select "Loot all." Open the cell gates to complete this section and return to the cutscene in the Tavern.
Cross the Bridge
- Escape the Wolves
- Get Rid of the Wolves
- Escape the Grayback Wolf
- Disengage and Push the Rock
- Tutorial: Dashing, Attacking, Dodging, Shoving Disengaging
Get Rid of the Wolves
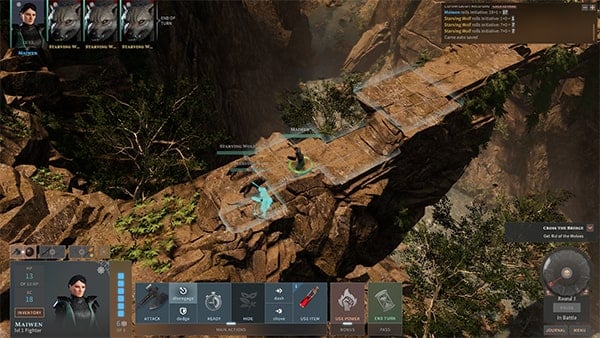
This section will put you almost immediately into a Battle Sequence. This will serve as a basic combat mechanic tutorial where the game will cover information on battle sequence Actions such as Dash, Attack, Dodge, Shove and Disengage during Combat. Use a combination of these Combat Actions to Attack the Starving Wolves and defend yourself until the Combat Sequence is completed. Use the tutorial recommendations when prompted. The first tutorial to pop is the Dashing tutorial. Select the action and then the cell space within the highlighted range to Dash to that point. Make your turns, then End Turn to prompt the next tutorials, Attacking and Shoving. Once you are within range, attack the wolves or use your position to Shove them off the bridge. The next tutorial, Dodging, will teach you how to Dodge. This gives you an advantage on Dexterity Saving Throws and gives the enemies a disadvantage on their attack rolls. Get rid of the wolves by using a combination of these tutorials to complete the objective and continue.
Escape the Greyback Wolf
This will prompt a tutorial on Disengaging. Disengaging will take up an . Select Disengage during your turn to escape the wolf. Reach the end of the bridge and position yourself behind the highlighted rock to prepare to interact with it. Push the rock over to collapse the bridge and escape the Greyback Wolf.
Leave the Cave
- Light Your Way
- Explore Further
- Use a potion to Heal Yourself
- Sneak Past the Orcs
- Cross the River
- Take a Long Rest & Escape from the Orc Hideout
- Tutorial: Lighting and Light Sources, Lighting Items, Healing, Cautious Mode, Take a Long Rest, Preparing Spells
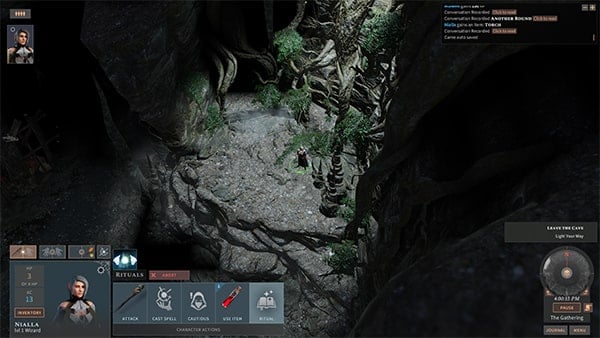
This section begins with the Lighting and Light Sources Tutorial which is especially important for characters without Darkvision, as the dark will make combat and exploration more difficult for them. This section will also teach you how to light objects found in the environment such as torches or lamps. You can either interact with them with a lit torch equipped or cast a flaming Spell to light them. To the west (left) of your current location, there will be a dim wooden gate. Cast your Cantrip, Fire Bolt to light the Torches on both sides of the gate. Select your cantrip, then select the object to cast it on that item. Your default hotkey for Cast Spell is "C" This can be modified anytime in your keyboard settings. Once the torches are lit, examine the totem in front of the gate to continue. You may now interact with the gate to enter the next area.
Explore Further
This will prompt a healing tutorial. You may heal either by casting healing spells if your character is capable or use a healing potion to regain some hit points. Loot the chest that will be directly on your right upon passing through the gate. Obtain the torch, food rations, arrows, and the Potion of Healing. Then from the inventory, heal yourself. After that, walk further to prompt the next tutorial: Cautious Mode.
Sneak Past the Orcs
Cautious Mode makes hidden objects and traps easier to locate. There will be a pulsating circle around the character when this mode is activated. This will indicate the character's noise radius, which is also affected by the character's Armor type and Stealth Skill. Avoid having enemies within this range to avoid detection since this mode also makes it harder for enemies to spot you. There will be an indicator that will gradually increase above an enemies' head if you are spotted. To be safe, keep 3 cell spaces in between you and enemies when attempting to remain stealthy. Activate Cautious Mode. Once active, the cautious mode symbol will appear above your character's head. Climb down the ladder one level down, then climb up to the ladder north of where you are that leads to the Gate mechanism. Activate the gears and exit out through the now open door.
Cross the River & Wait for the Orcs to Leave
Tap on the other side of the rock to have your character automatically jump across. Continue down the main path, jumping over rocks and climbing down the ledges until you reach the firepit and trigger a cutscene. Here you can take a long rest to recover hit points, special abilities, and spells. You must have at least one ration of food per party member, and you must eat at the Safe place location. These safe places are indicated with a campfire icon. These icons can also be found on your map. Before you take a rest, this would be the time to prepare your spells. If a spell is not prepared, it cannot be cast later on. Take a long rest. Click on the campfire to open the preparation page in order to modify your spell slots and prepare spells. When you are finished, start your long rest.
Escape the Orc Hideout
Slip through the narrow gap. Continue forward to finish the Quest.
Recover the Stolen Gem
- Enter the Fort
- Reach the Next Courtyard
- Find the Treasure Room & Get Liam's Gem
- Escape from the Fort
- Tutorial: Stealth, Using the Camera, Lockpicking, Sleight of Hand, Disarming Traps
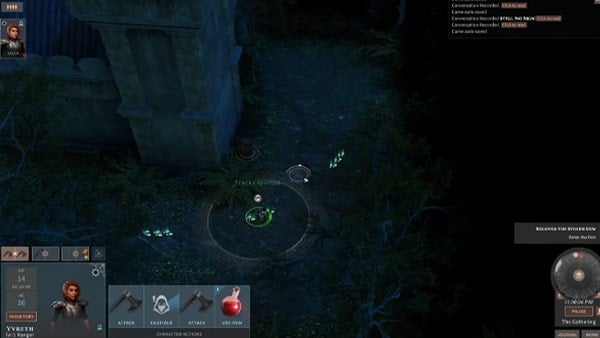
Move forward to prompt the first tutorial of this section: Stealth. This is done in Cautious Mode. Avoid carrying a light source as well to avoid detecting when being stealthy. Keep Cautious mode for the duration of this Quest. Follow the set of tracks to continue. The next tutorial will teach you how to control your camera. Right-click and drag or use Q and E to rotate. pressing W with a character selected will zoom in on them. The WASD or arrow keys are also used to control and pan the camera around. After you dismiss the tutorial box, loot the basket at the corner wall of the fort to obtain Thieves' Tools. Follow the footprints to a walled section of the fort and interact with the object to move it out of the way to reveal the hole in the fort wall.Crawl through.
Reach the Next Courtyard & Find the Treasure Room
With your thieves' tools, lock pick the door ahead. left-click the locked door. A higher proficiency with Thieves' Tools would help with this task. Go through the set of doors to activate the Sleight of Hand tutorial. Proficiency in this skill will help with Pickpocketing. The armor you have equipped could also affect your chances of success at a stealth check.
Slowly approach the courtyard, and from behind, steal the Treasure Room Golden Key from the Bandit Quartermaster. Continue down the path and take the door to your left. There will be a crate you can climb to gain access to the inside of the building. Enter through the window. Approach the set of doors to activate the disarming traps tutorial. These traps are more easily detected in Cautious Mode and will be highlighted in red. Left-click on the trap to attempt to disarm and go through the Dexterity check. Proficiency with Thieves' Tools will also help with this skill.
After disarming the trap, Use the Golden Key to unlock the Treasure Room Doors and enter. Loot the chest to obtain some coins and Liam's Heirloom.
Escape from the Fort / Kill the Loan Shark and Save Liam
Return to the window you used to enter the building. This will prompt the tutorial: Critical Characters. Don't let Critical characters die. In this case, Liam is the critical character. Enter the battle sequence and approach the Loan Shark to engage in combat. Attack him and complete the battle to finish the Quest.
Video
[video]
Map
[map]
Trivia & Notes:
Trivia and notes go here
Legacy Council
- Previous: Prologue
- Location: Caer Cyflen
- Next: ??
- Recommended Levels: ???
Video Playthrough
[video]
Maps
[maps]
Legacy Council Quests
- The Legacy Council
- Caer Lem (Quest)
- Report to Carran
- Explore the Ruined Tower
- Report to the Council
- Gem Quest: The Dark Castle
- Gem Quest: The Monastery
- Path to Glory
Secondary Quests
- Origins of the Crown
- Quest for Information
- Arwin Merton's Story
- Visit the Local Scavenger HQ
- The Scavengers' Headquarters
- Convey the Scavengers' Message
- Lair of Filth
- Sorak Relic
- Misaye's Birthday
- Runs in the Family
- Honor Your Masters
- Shadow of the Past
- The Law is the Law
Items
Consumables & Tools
- Ration Pouch
- Potion of Healing
- Scroll of Color Spray
- Healing Remedy
- Oil of Acuteness
- Handy Haversack
- Antitoxin
Equipment & Ingredients
- Scimitar
- Shortbow
- Shield
- Warhammer
- Imperial Gate Plaque
- Brimstone Viper Scales
- Rapier
- Troll Acanthus
- Arrows
- Storm Heather
- Diamond
- Shortsword
- Magnificent Leather Armor
- Tirmarian Inquisitor's Journal
- Timarian Holy Symbol
- Primed Shortsword
- Emerald
- Amethyst
- Sapphire
- Magnesium
- Dagger
- Club
- Myths of Solasta
- Deep Spider Venom Gland
Enemies
- Goblin
- Goblin Skirmisher
- Brimstone Viper
- Sorr-Akkath Skirmisher
- Sorr-Akkath Saboteur
- Sorr-Akkath Warrior
- Cult Fanatic
- Worker
- Badlands Spider
NPCs
Main Story Walkthrough
Legacy Council
- Meet Carran at the Legacy Council
- Level Up
- Buy Some Food for your Journey
- Secondary Quest: The Scavengers' Headquarters
- Secondary Quest: Convey the Scavengers' Message
Meet Carran at the Legacy Council
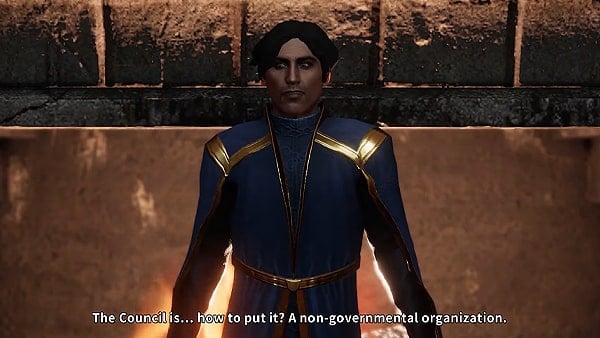
After completing prologue Quests and tutorials, Complete the dialogue with Lord Carran to continue. Navigate around Caer Cyflen to get to the Legacy Council. As you explore new areas, your map will fill itself. You may access your map at any time. Your map will allow you to Fast Travel and locate interactable items so you don't miss any looting spots. The Legacy Council will be indicated as the blinking marker on the compass. Follow the marker to reach the Legacy Council.
Level Up
After the cutscene, a Tutorial on Faction Relations and the Location Map will pop up. You can use your Map to Fast Travel in and out of locations. The tutorial asks you to fast travel back to the Tavern, Gravekeep's Cask. Once you have arrived, speak to Kartel Martel to progress on your next objective, Level up. He will have a "!" mark. Once you have enough experience at any point, you are able to level up. In order to level up, characters must take a long rest. Ask Karel for a room so you can take a long rest and level up. This will complete the Level Up Objective.
Buy some food for the Journey
Exit the Tavern and go straight into the market stalls on Market Street directly in front of the Gravekeep's Cask. First, speak to Hugo Requer, owner of the Magic and Curiosities stall. You will be prompted with a tutorial on Crafting. Take a look at his shop inventory. He will have some potions, Scrolls, Ingredients, and Spell Focus Items for purchase, though most of them will be unavailable for now due to your insufficient Faction Relation. Next, visit Gorim's Emporium and speak to Gorim Ironsoot. She runs the General Store for Adventurers. She will sell an assortment of wares and Weapons. You'll need to purchase at least four Ration Pouches for your journey. This will complete the first Main Story Quest, Legacy Council.
After your purchase, you will be immediately met with a cutscene with Annie Bagmordah, Quartermaster of the Scavenger's Guild. She will ask you to stop by their headquarters downtown. This will begin a new Secondary Quest, The Scavengers' Headquarters. This will be activated alongside the new Main Quest, Caer Lem (Quest). If you want to complete the secondary Quest objective, visit Annie Bagmordah near the Gravekeep's Cask. This will improve your relationship with the Scavengers. She will make a preposition and will send you on another Quest, since speaking to her completes the first Secondary Quest, Visit the Scavengers' Headquarters. The next Secondary Quest, Convey the Scavengers' Message will now be activated, and your objective will be to Speak to Captain Henrik who is said to be at the Caer Lem Outpost, and your next destination for your Main Quest.
Caer Lem
- Reach the Outpost
- Explore the Fort
- Secondary Quest: Lair of Filth
- Reach the Door to the Dungeon
- Talk to Daliat, Lisbath, and Robar
- Fight
- Escape from the Caves
Reach the Outpost
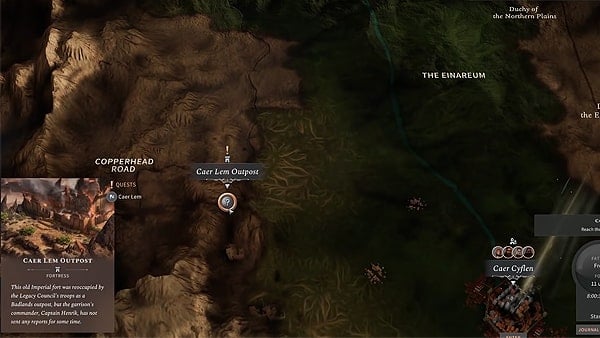
Just in front of Gravekeep's Cask, there will be a Bridge for you to leave the area. Head West till you reach the area and leave. This will take you to the main map where you can fast-travel to different locations. While traveling, your characters may face some encounters or manage to pick up some items for Crafting. There will be a tutorial for Traveling, Travel Pace, and Travel Settings here. Travel to Caer Lem Outpost. While you travel, there is a chance you will encounter a Surprise Attack Battle Sequence.
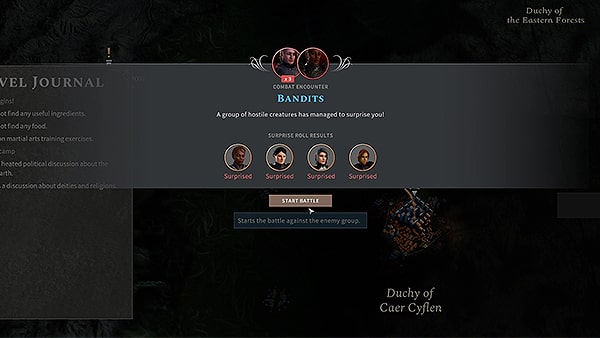
This will trigger the Surprise Attack Tutorial. This encounter will prevent you from taking action on the first turn of your Battle. The next Tutorial pop-up: Ready an Action will explain that you can ready an action to wait for specific conditions to be met to interrupt turn and perform the Action. Try this by selecting Ready in your Actions bar. Doing so will end your turn. Complete the battle sequence to continue your long rest. Click on the campfire to continue. After their long rest, they will continue their journey to Caer Lem Outpost. Another tutorial: Interrupting Travel will inform you that at any time you may press the interrupt button on the bottom right of your screen below where your compass would normally be. You can do this to start crafting, change equipment, or toggle with any settings.
Explore the Fort
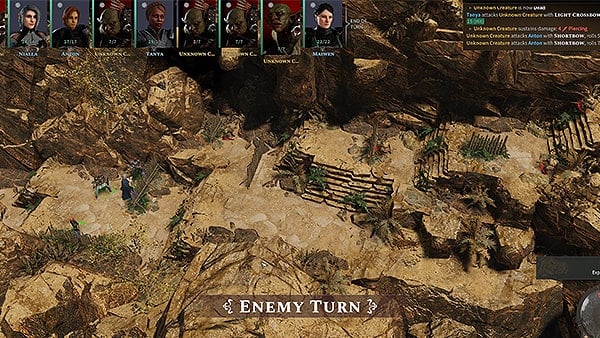
Once you have reached Caer Lem, travel through the main path. You will eventually encounter another battle sequence against some goblins along with the Tutorial: Take Cover. Use walls and other large objects to take cover. Available areas for cover are indicated by the shield icon. This will be followed by an Inventory Utility Tutorial where they will inform you that your inventory can only be modified once per turn. Complete the battle sequence to continue. Upon completion, there will be a tutorial for a short rest. Go ahead and take a short rest then continue your journey. Don't forget to loot after your battle. When you continue be observant of the ground and there will be some tracks leading off to the side of the cliff towards the right. In Cautious Mode, these tracks will be highlighted. Interact with the tracks or follow them down to begin the Secondary Quest, Lair of Filth. Your objective will be to Clear the Goblin Cave.
Clear the Goblin Cave
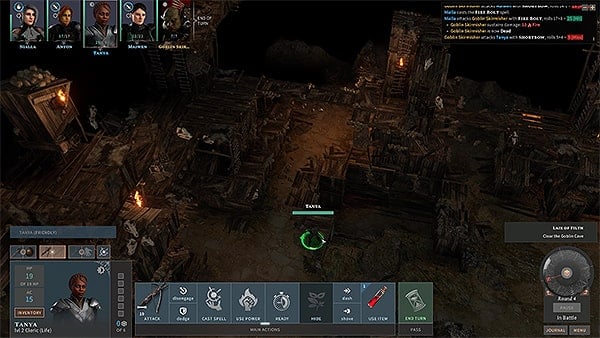
Crawl through the next area. The tutorial: Falling Hazards will pop up warning you of potential dangers. These can also be used to your advantage during battle as these could fall on your enemies and crush them as well. Use a spell or arrow to trigger them. Use cautious mode to approach the goblins and clear them in the battle sequence. After clearing the battle, loot the Goblins for some coins, gems, rations, and spare Weapons such as Scimitars and Shortbows. There are two lootable baskets atop the two towers. Check your map to see their exact location.
Return to your main path and continue. Before you reach the gates, there will be three flights of stairs. Before you enter, go to the right where the bonfires are and there will be a chest to loot. This will only contain some coins, an Angry Violet, and a Candle. Proceed to the entrance to continue and trigger a cutscene. To the west, interact with the highlighted wall to trigger a short cutscene about orange stone. Climb the tower post ladder located just at the entrance and hop over the platforms to reach another chest. This will contain a Warhammer, coins, and a Troll Acanthus. On the right side, there will be a crate you can interact with. Push the crate to be able to climb up and there will be another chest to loot there. This will contain a Shield, Arrows, a Storm Heather and a Diamond. Continue exploring the fort until a cutscene is triggered.
Reach the Door to the Dungeon
When you see the central fountain area, interact with the arch structure on the left. This is called a Minor Imperial Gate. You will obtain an Imperial Gate Plaque. Proceed up the first flight of stairs with the gap. Move the crate in front. This will trigger a Battle Sequence with a number of Brimstone Vipers. Use your spells and arrows to defeat them. If they are found in the same general area, sometimes you can perform a spell that will hit multiple targets. Try to get an upper-ground position. Complete the battle to continue.
Continue through the narrow walkway going south and push the box crate in front of you to make your way to the next platforms in front. Continue to the next flight of stairs and the Tutorial for Camera Elevation will pop up. Reach the end of the walkway on the upper level and disarm the trap directly in front of you. Hop over and do the same thing o the next trap. Hop over the last gap and you will reach the door to the dungeon.
Talk to Daliat, Lisbath, and Robar
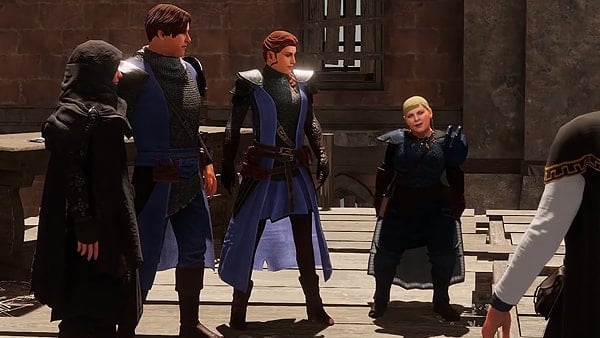
You will need to speak to all three to gain perspective on the situation. Daliat will be just one level below. Take the ladder down and speak to him. Both Lisbath and Robar will on the ground level standing in each corner. There will also be a chest to loot right next to where Robar is standing. It will contain a Potion that needs to be identified and two Scrolls.
Daliat Sunbird - Daliat was a Scout from the exploration that came back alive. The Soraks came and attacked the outpost the next day. He did not share much information about the situation
Lisbath Townsend- You'll find out from Lisbath that Daliat was the only scout that came back alive and that makes her suspicious of him.
Robar Sharp - Robar will also suspicious of Daliat. He also believes that Lieutenant Beryl Stonebeard is not competent enough for this position and doesn't agree with staying.
Choice: Talk to Beryl, Daliat, or Robar.
In this next section, you will need to choose who to side with and that will affect what happens next. The following will occur when choosing to speak with either person. All three options will end in a battle sequence.
- Talk to Beryl and persuade her to step down. To succeed, this will require an Intimidation or Persuasion check. Continuing this way will get Lisbath killed by a Sorak and will initiate a battle sequence.
- Talk to Daliat to get him to trust you. You will find out he took something from his expedition to the Badlands. He will give you a Silent Whisper Parchment, a faction relic. Robar will still be killed in this scenario, triggering a battle sequence.
- Talk to Robar. This will end in Lisbath's death instead and will trigger a battle sequence.
Fight then Escape from the Caves
Complete the battle against the Soraks. The cutscene that follows will take you into a secret passage to escape. Take the north path and push the rock out of the way then crawl through. Approach the next intractable rock in front and the cutscene will focus on the clothing left behind.
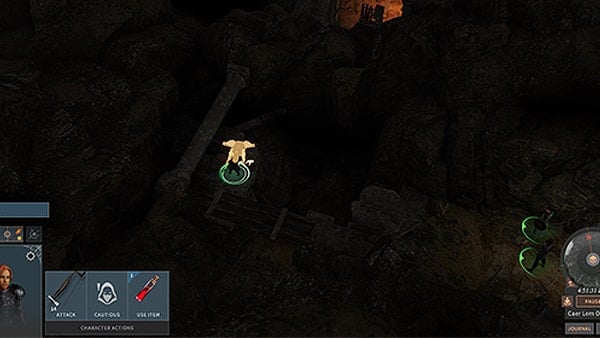
Push the rock then climb over it to reach the wooden plank and it will create a way for you to reach it. Loot it and you will obtain some coins, Scroll of Color Spray, >Magnificent Leather Armor, and the Tirmarian Inquisitor's Journal. Continue north and you will encounter a group of Soraks. They suggest going for a surprise attack. A tutorial for that will be revealed. This will cause them to lose a turn. Activate Cautious mode and approach the campfire slowly. climb down to the levels just above the Sorraks and prepare your characters by putting them in your desired attack positions before initiating battle. Begin by pushing the rock below, crushing the Sorak underneath.
Complete the battle then loot the area.
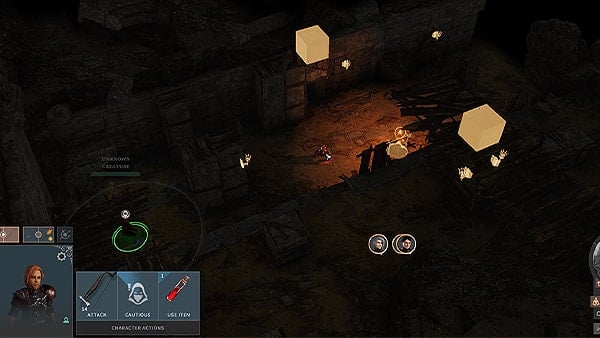
Take advantage of the Campfire and take a Long Rest if needed. Remember to prepare your Spells. After your long rest search the rest of the area for lootable crates. You will find spare coins and basic Weapons in the area. Disable the trap beyond the archway on the left (west) to loot the box next to it. Move the block just above the platform to reveal a small passage through and you will come across some coins and small Ingredients. On the opposite side to the right, you will notice some climbable rocks and one boulder that you can interact with. Climb on top and push the roc aside to get through. You will find a Tirmarian Holy Symbol.
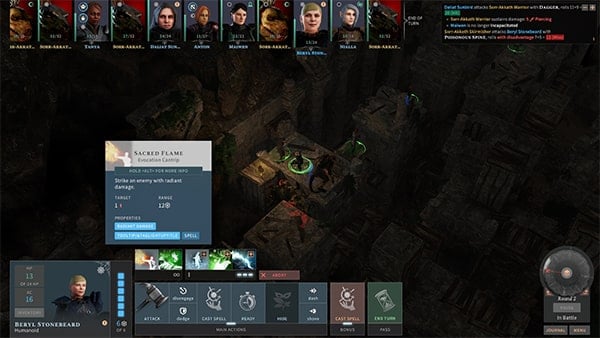
Continue to take the path going north until you come across the Rotating Bridge. This will be added to your map as a new Waypoint. Interact with the switch in the middle to rotate the bridge. Cross the bridge to trigger another battle against more Soraks. Loot the area once they are defeated. There will be some special items such as Oil of Acuteness, Emerald, and a Primed Shortsword.
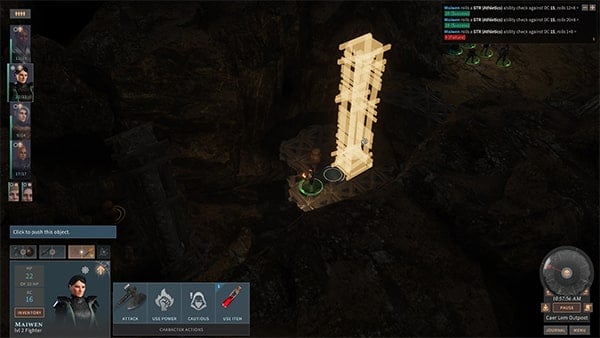
Continue to head north until you reach the area out of the wooden structures. There will be a path that splits to the left (west). Use a character with the highest Athletics Skill to jump across or Cast a Jump Spell on a character. The first basket will contain a Sapphire, x3 Amethyst, Magnesium, and a Shortbow. The second basket will contain the Recipes for Crafting Scroll of Mage Armor, Crafting Scroll of Bless, and Emperor's Eye. Once you are done with the area, continue north to the highlighted space to exit the cave. Returning to Caer Cyflen will end this Quest and begin the next one. Fast Travel to Caer Cyflen.
Report to Carran
- Meet with Carran
- Secondary Quest: Convey the Scavengers' Message: Report to Annie
- Choice: Talk to Beryl /Daliat/ Robar
- Travel to the Ancient Tower
Report back to Lord Carran. He will be at the Graveyard's Keep Tavern. On the way to the Tavern, speak to Annie Bagmordah to inform her that Captain Henrik is dead and that will conclude the secondary Quest, Convey the Scavengers' Message. Completing this quest will put you in a favorable position with the Scavengers and gain you relationship points. The Tavern is just up ahead. Walk there, or open your map to directly travel to the tavern. Lord Carran is standing in front of the fireplace. This will activate the next cutscene.
Choice: Talk to Beryl /Daliat/ Robar
Speak to either of the survivors to find out any leads. All three will lead you to the same location,
- Find Beryl and ask her if she knows anything. Take a look around the Snow Alliance Embassy.
- Find Daliat and ask him if he knows anything. Take a look around Lane Ends.
- Find Robar and ask him if he knows anything.
Travel to the Ancient Tower
Fast Travel to the Possible Sorak Base located on your map west of the Caer Lem Outpost. On your journey to the Sorak Base, You may encounter some enemies and a battle sequence. Complete this and continue your journey. Your arrival will end this section and begin the next Main Quest, Explore the Ruined Tower
Explore the Ruined Tower
- Secondary Quest: Quest for Information
- Find out what the Workers are Doing
- Fight
- Enter the Excavation
- Continue Exploring
- Follow the Light
- Find a way to Open the Door
- Activate the Runes and the Orb
- Exit the Library
- Kill the Soraks
- Seize the Artifact
- Bring back the Crown
Now that you're at the Possible Sorak Base, a new quest has started, along with a new secondary quest, Quest for Infomation. Approach the edge of the cliff and they will observe some workers instead of Soraks. They suggest approaching with Caution, either approach will lead into a battle sequence against the Workers. They only have 8 HP each so it will be fairly easy to complete the battle without Spells.
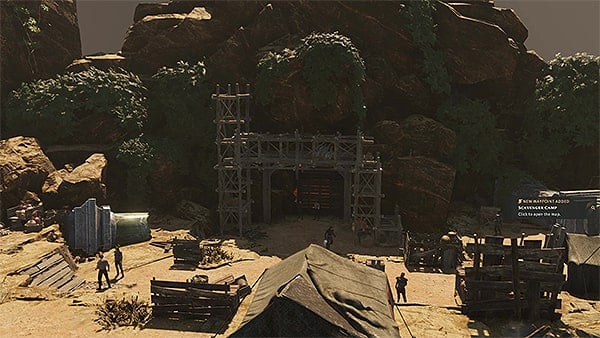
After completing the battle, loot the area. There will be a lootable crate to the left of the excavation entrance that contains a Dagger, Club, Warhammer, and other basic Weapons. The basket atop the wooden structure just right of the entrance contains a Longsword, Club, and a Shortsword. Take the ladder to reach it. Further right, down the ramp, is another chest that will contain the Faction Relic, Myths of Solasta. The Faction, Tower of Knowledge may be interested in this Relic. You will also find a Scroll of Magic Missile,Amethyst, a Dagger, and some Ingredients. Go around the tents in the same direction behind that chest there will be a basket with a Ration Pouch and more Ingredients. Once you are satisfied and have looted the area, continue through the gate and enter the excavation.
Enter the Excavation
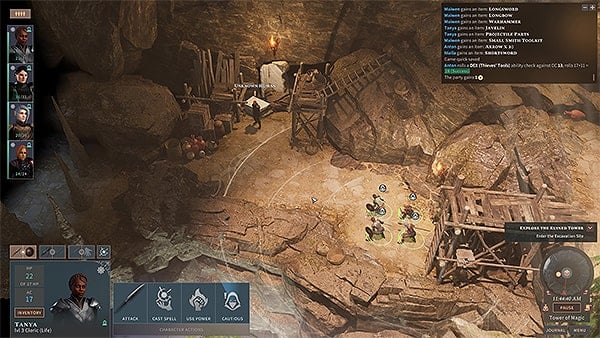
Follow the path down the double ladders. After going down one level, you will find another chest with 10 Torches, more Ration Pouches, and an Antitoxin. Go down another level and you will come across another worker. Speak with him. He will say there are Soraks nearby and appear to die in front of you. Continue exploring. Continue east to the cave area with the Stalagmites. Move the rock ahead to get through. Up ahead you will see a magical current coming from below and another rock you can interact with. Push the rock over and the magic will raise it. This will create a path above and close the gap of the broken pillar.
- You don't want to miss this chest of loot as it contains some handy loot. You can climb up to the broken pillar. Cross the gap first and select the rock platform before the pillar starts to climb it. Cross the pillar and there will be a chest. This chest will contain a Handy Haversack, a Primed Dagger, A Crafting Scroll of Bane Recipe, coins, and Ingredients.
Continue down the path and climb down. You will eventually reach a paved area. Approach the area and you will discover a magic library. Follow the light - Follow the lighted torches. They will light up as you go. Push any blocks in your way and it will lead you to a locked door and a magic orb. It did not open the door.
Find a way to Open the Doors
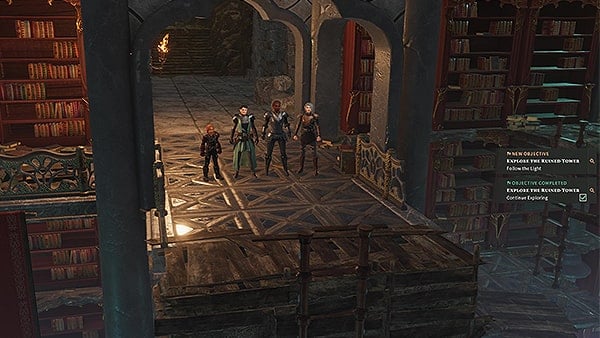
Backtrack and head back to the Library entrance. It's best to be Cautious in this area as there are a few, though not many, traps. Instead of taking the route to the right this time, go the opposite direction down to the left. This side will still be dim but will be revealed as you travel. Reach the point of the Magic current and hop across the gap. Position yourself behind the boulder then push it into the current. Cross the new gap and now you can take the ladder down and push the other rock into the current as well. You now have access to interact with the statue.
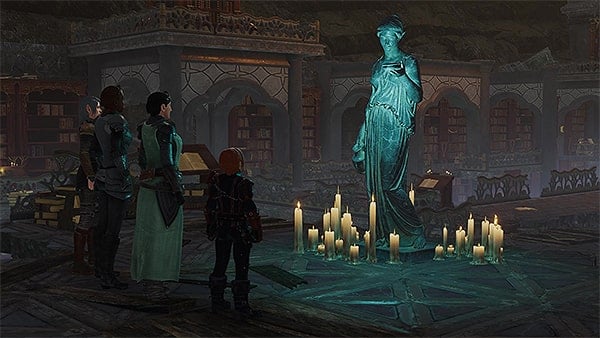
- Secondary Quest Objective: Interact with the statue. This will be the first clue and one of your objectives for your secondary quest, Quest for Information
Continue down the path behind the statue to its left and hop the path gap. You will eventually reach two paths
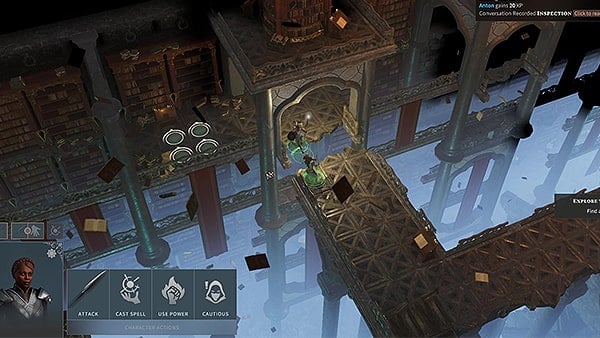
- Secondary Quest Objective: Take the path to the left (east) hop the gap and observe the book on the stand left of the arch. You will gain an item: Myths of Solasta. This will be the second clue for the Quest for Information
Return and take the other path going south. Knock the first pillar over and if you rotate your camera, there will be a set of two ladders going down. Take the ladders down to the level below and knock over the second pillar to seal the gap. You can now go up and cross via the new bridge you just created with the second pillar. If you don't have Cautious mode on, activate it to reveal the trap ahead. The trap will be on your right. Disarm it to continue.
- Secondary Quest Objective: Before you leave the area, observe the statue on the left to find your third clue for your Quest for Information.
Now you can either take the narrow path in front or head down the double ladders. First, continue on the route ahead and instead of taking the ladders down, first cross the gap directly ahead of you and take the ladder up to the higher platforms. This will give you access to the corner chest, which will contain Primed Leather Armor, a Crafting Scroll of Jump Recipe, and other Ingredients. From the highest level take the route to the suspended platform. This is the gap you previously sealed off by knocking over the first pillar. You may now use the pillar to cross. This will lead you to another chest. This chest will contain a Crafting Scroll of Fog Cloud Recipe, Crafting Battleaxe of Acuteness Recipe, a Javelin, Candle, Scroll Kit, and more Ingredients.
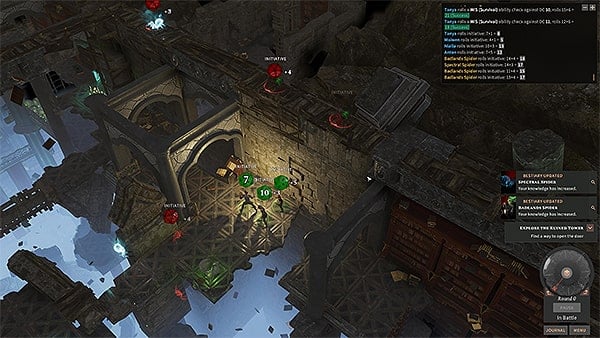
At any point here, prepare for a battle and stay lit. Return to the area with the double ladders going down. This is where went straight and took the ladders up to reach the chests instead. This time, take the ladders down. Jump over to the suspended platform facing east to push the boulder rock into the magic current. Sometime in this area, you will trigger a battle with some Badlands Spiders. A lot of these areas are unlit. You will need to find light or carry a torch to at least always be in the light.
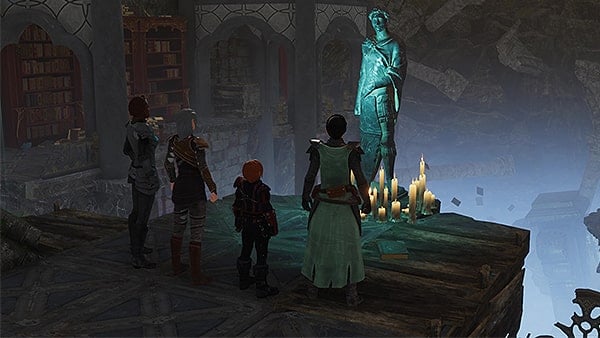
Complete the battle and loot the area. You will have plenty of Deep Spider Venom Glands. Keep moving and cross the now filled-in gap that you just fixed by knocking the boulder down below. Just across it is another statue.
- Interact with the statue again to find the fourth clue and complete the Quest for Information.
Continue the path going north. Your only option is to go left from here. Take the ladder up directly in front to get to a chest containing Primed Leather Armor, more Ingredients, and another Crafting Scroll of Jump Recipe.
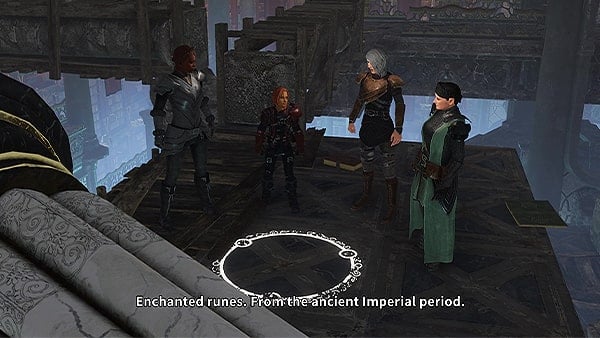
Head back down and continue the path forward. Knock the pillar over to cross. You will come across your first set of runes marked on the floor. Your new objective is to located and activate all four runes in order to be able to activate the orb that opens the door. Simply step on the runes to activate them. This will also cause the Magic Runes Puzzle Tutorial to pop up, and it will tell you the same thing. The largest glowing rune on the ground is not one of the runes. Locate and step on the barely glowing runes.
Active the Runes / Activate the Orb
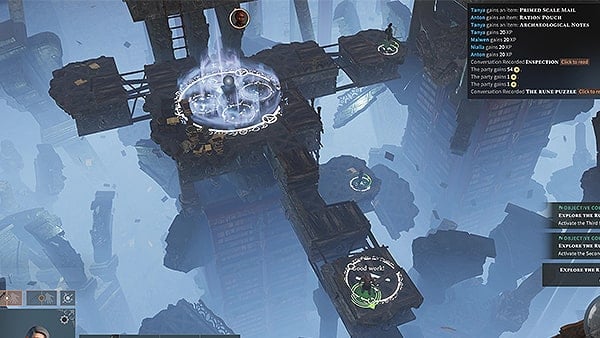
- Step on the first set of runes you found. This will activate the fourth rune
- Head down and to the north, there will be two interactable boulders. Push off the one at the end to reveal the first rune and activate it.
- Take the ladder down another level, step on the corner to activate the third rune.
- Head back up and head to the isolated area to the east. Hop the gap and that will be the second rune.
All runes will now be activated. Return to the large circle of runes and activate the orb to open the door. There is now a clear path to the door, so select the area where you first found the orb upon entering the library to take the characters there and exit the library.
Exit the Library
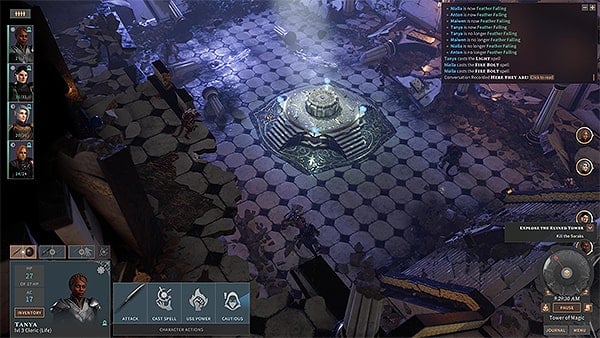
There will be a campfire here. Prepare your rest and take a long rest. After your rest, continue down the path to trigger the Mana Lamp Tutorial. These lamps shine brighter than torches. Cast any flame spell or cantrip to light the mana lamp. Open the set of doors and prepare for battle. Surprise attack the Soraks. During the battle, try to stay well lit. It's also best to avoid the 32 HP creature first as he has a good blocking system. He will be much easier to attack when he's Flying. Wait for him to fly then attack him. Until then, focus on the other Soraks.
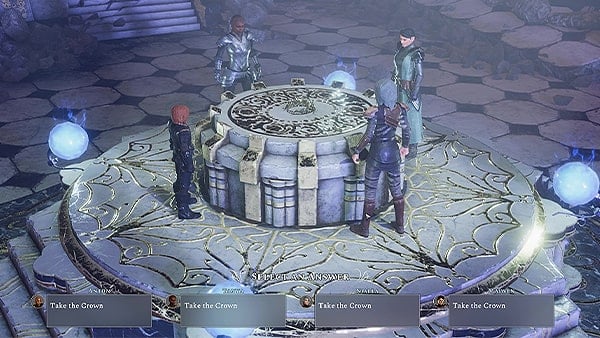
Complete the Battle and loot the area. There will also be a chest to loot on the upper floors where you came from. The chest will contain a Blood Ruby, Primed Leather Armor, coins, and another Recipe. Seize the Artifact when you are finished and bring it back.
Bring back the Crown
Use your map to Fast Travel back to the Excavation site to get to the exit point then Fast Travel back to Caer Cyflen. Your arrival will end the Quest, Explore the Ruined Tower and begin Report to the Council.
Report to the Council
- Go to the Gracekeep's Cask
- Secondary Quest: Arwin Merton's Story
- Return to the Council
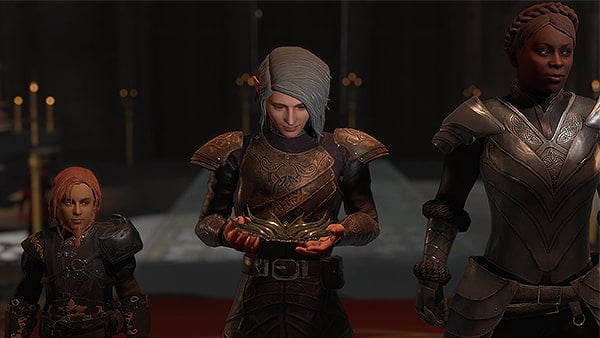
Head to the Tavern to speak to Lord Carran and trigger a cutscene. This will also begin the Secondary Quest, Arwin Merton's Story. You will need to ask Annie about Merton when you come across her. After the cutscene, you will wake up in a different location. Your objective is to return to the Council.
Return to the Council
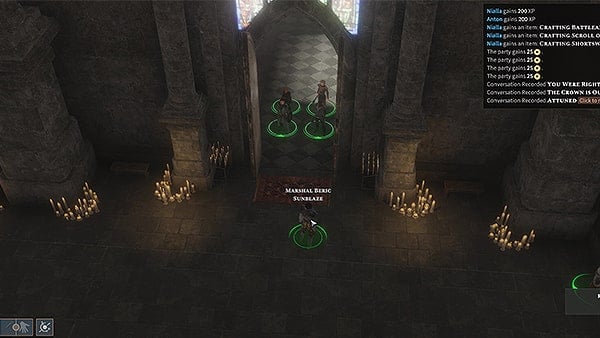
Exit through the set of doors ahead. It will enter a cutscene and it is suggested that you speak to other members around the area before you return to the Legacy Council building to complete your objective. In the first room, you will find the Priest of Einar, Maddy Greenisle, and Heddlon Surespell.
- Maddy Greenisle works for the Tower of Knowledge. She says you can find her anytime at the Tower downtown. Speak to the members around the area to improve your relations with different Factions.
- Before you exit, Heddlon Surespell, representative of the Arcaneum, will ask for some of your time to express his interest in gaining anything from the Manacalon-era Arcaneum especially. He can be found in the Gravekeep's Cask.
- Joriel Foxeye will be from the Circle of Danantar. She will express that their grandmaster Edvan Danantar noticed them and they are open to working with them. She can be found at Sunblaze Court.
- Secondary Quest: While you are in the main area of Caer Cyflen, speak to Annie Bagmordah to ask her about Merton so you can progress in the Arwin Merton's Story Secondary Quest.
When you are done speaking with other Faction members, Fast travel directly to the Legacy Council to be greeted by the last member to speak with before completing the objective.
- Halman Summer is the representative of the Guild of Antiquarians. He invites you to visit them at the Embassy of the Snow Alliance.
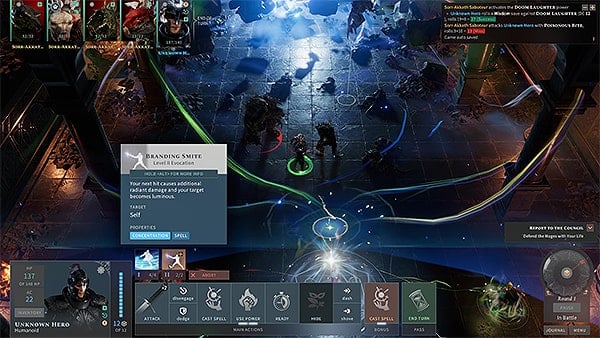
You can check your relationships with the Factions at any point in the game by opening your menu and checking your Journal. After your conversation with Halman, you will then enter the Legacy Council and it will take you into a vision of a Battle Sequence featuring an Unknown Hero. Fight to continue. This will end the Report to the Council Quest, and begin your first hunt for the gems: Gem Quest: The Dark Castle.
Video
[video]
Map
[map]
Trivia & Notes:
Trivia and notes go here
Gem Quests Information
- Previous: Legacy Council
- Location: Caer Cyflen
- Next: Path to Glory
- Recommended Levels: ???
Video Playthrough
[video]
Maps
[maps]
Gem Quests
Secondary Quests
Items
Consumables & Tools
Equipment & Ingredients
- Pile of Bones
- Emerald
- Crossbow Bolt
- Arrow
- Magnesium
- Dragonrose
- Animal Figurines
- Exquisite Robe
- Wand
- Velvet Figurine
- Jeweled Chalice
- Silver Chalice
- Animal Figurines
- Lizzaria's Journal
- Jade Pendant
- Ivory Statuette
- Imperial Figurine
- Splendid Half Plate Armor
- Primed Rapier
- Aksha's Journal
- Doom Gem
- Silver Brooch
- Wand of Lightning Bolts
- Handy Haversack
- Precious Ring
- Longbow
- Mace
- Quarterstaff
- Club
Enemies
- Skeleton
- Skeleton Archer
- Ghoul
- Wolf
- Zombie
- Ghost
- Skeletal Knight
- Skeletal Sorcerer
- Goblin Shaman
- Goblin Cutthroat
- Minotaur
- Orc
- Orc Archer
- Darkweaver
- Veteran
- Sorak Infiltrator
- Coparann Guard
- Dire Wolf
- Winter Wolf
- Tiger Drake
- Brood of Blood
- Brood of Dread
- Spectral Servant
NPCs
- Talbut the Grey
- Angbi Kramsson
- Kythaela
- Lizzaria
- Aksha
- Master Mardracht
- Galar Goldtongue
- Joris Nikannen
- Wilf Warmhearth
- Milan (Scavengers Leader)
- Atima Bladeburn (Priestess of Arun)
- Coparann Ceannard
- Coparann Baron
- Mayor Kiaradth Bright-Spark
- Captain Verissa Ironshell
Gem Quests Walkthrough
Gem Quest: The Dark Castle
- Follow the Crownbearer's Intuition
- Enter the Castle's Courtyard
- Enter the Castle Keep
- Secondary Quest: Angbi's Bones
- Get to the next Floor
- Locate the Master
- Find a Way Out of the Maze
- Find the Master and the Gem
Crownbearer's Intuition
After the Legacy Council meeting, travel to the place that the crownbearer is being drawn to and search for a gem. Prepare for your journey by clearing your inventory and selling any unwanted items to clear up some space. Take a long rest if needed. When you are ready leave the area and Fast travel to the "Possible Gem Location" far southwest on the map. You will probably encounter a few battles on the way to the location.
Once you are at the Possible Gem Location, explore the are in Cautious Mode. Stay to the right with the interactable tree going north and you will come across a lootable basket. It will contain an unidentified Potion and some Ammunition. Continue down the path west until you reach the bridge to the Castle.
Enter the Castle's Courtyard
Heading left of the bridge first (south) will eventually lead you to a campfire and a cutscene introduction. If you decide to talk to him, you will need to undergo an Insight check. His name is Talbut the Grey. He will mention that he deals with the guard captain and exchanges information for hunting permission. He will also mention that there will be a ghost dwarf in the area. You will need to locate him to activate and complete the secondary mission, Angbi's Bones. A new waypoint will be added so you will be able to travel to this point, the Pond when you open your map.
Before you leave the area, loot the basket found at the outside corner of the cabin. It will be on the west side. Be careful when lingering around him as you can trigger a battle sequence against him and his wolves. This basket will contain A Pile of Bones needed for your secondary quest later on. The box basket outside will have a Scroll, x4 Ration Pouch, and x4 Torch along with more Ingredients. Go ahead and lock pick his cabin and loot the crates inside for some Ingredients and Scrolls. The Library shelf will contain a Potion of Healing and more ingredients.
Another notable location is the northern area of the Castle. There will be a campfire rest point for use should you need to take a rest and recover. There will also be a lootable basket within the vicinity of the campfire. This will contain A Sapphire, A Scroll, Ingredients, Animal Figurines, Ration Pouch, Exquisite Robe, and coins.
- Also North of the castle, past the campfire while keeping to the left is the Cemetery where you will find Angbi Kramsson the Ghost Dwarf. You could ask him for information about the castle and also begin the Quest, Angbi's Bones.
- The third set of bones is located in a basket in the area near him. The second set is from the basket we came across at the corner of Talbut the Grey's cabin. The first set will be within the Castle Courtyard. It will be in a basket located in one of the rooms of the Keep. The courtyard can be accessed through the crypt in the cemetery as well, but a battle cannot be avoided. Once all three are obtained, you can return to Caer Cyflen at a later time and return the Bones to Halman Summer of the Antiquarians to complete the secondary quest.
Loot the Cemetary area for more valuable gems and Ingredients. The crypt will also lead to another route into the castle keep.
When entering the Castle's Courtyard you may enter directly through the bridge or through the crypt in the cemetery. Either route will lead to battle. The first sequence will end in a cutscene against the Skeleton guard leader. Fail any of the checks and you will enter another battle. If entering through the main bridge, the cutscene will take you out and you will still have to enter through the cemetery crypt.
Enter the Castle Keep
Enter the Keep to enter another battle against some ghouls. Attempt to stay lit as much as possible during battle. Complete the battle and explore the area. This area connects to the castle courtyard. Loot the baskets in the area. You will mostly find basic gems, Ingredients, and coins, but one of them will contain a Wand. When you are done, to the Northwest corner there will be a highlighted area in front of a drain. This is where you can leave the area and enter the castle.
Get to the Next Floor
Once you are in the castle, you will find yourself in an empty dark room. Behind you, in the northeastern direction of the room, there will be an interactable book on the bookshelf. Interact with it to trigger the secret wall passage to open next to the doors. Before you leave, you can take a flight of stairs in the room going up. This will lead to a lootable bookshelf that contains more gems, Scrolls, and a Rapier. Approach the open passage to enter a Battle against the Zombies. When you have completed the battle and looted the area, continue. Light the lamps in the area. Open the north set of doors to move on and prepare for another Zombie battle.
- Loot the area when you are done. Aside from the regular items, you will also find a silver chalice. Open the cell gates toward the northern side of the room and you will find some valuable items. The first cell on the left will contain a Sapphire, a Gold Locket, Jeweled Chalice, Ivory Statuette, Bronze Crown, Animal Figurines, and izzaria's Journal. In the main area, where the glowing table is, there are some lootable pots that will contain a Sapphire, Velvet Mask, Jeweled Bracelet, Ivory Statuette, Embroidered Silk Robe, and another one of Lizzaria's Journals. The crate under the flight of stairs will contain some Ingredients. The Library Shelf will contain Acid, a Scroll, and more Ingredients. Loot the nightstand at the Southwest corner bedroom for a Blood Daffodil, an Amethyst, and another piece of Lizzaria's Journal. Double-check your map to see any unlooted baskets.
Take a Long rest here. When you're done with the area follow the glowing dot on your compass and head to the northeast corner up the stairs. Activate the switch next to the cell gate and go through. Enter the highlighted area to get to the ladder that leads to the next floor.
Locate the Master
Proceed into the area. Stay lit and approach the Ghouls to start the battle against the Ghouls. Your victory will lead to a cutscene where you will need to pass some checks with Lizzaria. She will recommend speaking with Aksha. You will be back on the ground floor when you end the cutscene. Return to the upper floors to continue looting. When you are through, head to the southwest corner and climb to the upper level. There will be a broken wall to the left that will lead to a grand staircase area. This will lead to another ghoul battle. Light any lamps when possible and keep yourself lit.
When the battle is complete head back up the staircases and this time head to the left. Get past the gap and loot the basket next to the short flight of stairs. continue to the dining room area and there will be a large set of doors to the left again. This will trigger a cutscene with the Vampire, Aksha where you will have to pass some checks. She will lead you to the Minor Gate that will be your route to the master.
- Loot the area before proceeding. You will find an Imperial Figurine, Splendid Half Plate Armor, and a Magnificient Shield near the Armor Stand. Loot the bed to obtain a Sapphire and a Primed Rapier. Loot the Nightstand for Aksha's Journal, Doom Gem, Ruby, Unidentified Potion, Silver Brooch, and Magnificient Wand. Identify the Wand to find out its properties.
When you are done with the area, go through the set of doors to proceed to the Minor gate. Use the minor gate to teleport to the next area.
Find a Way out of the Maze
A new Waypoint has been added: Teleporter. Approach the area with Cautious Mode and disarm the traps on the area. Open all available doors in the area. Loot before proceeding. On the ground, you will find A Scroll of Fireball, Adventurer's Journal, Handy Haversack, Precious Ring, Wand of Lightning Bolts, and coins.
Choice: Follow the Adventurer's Journal
Follow the Adventurer's Journal to help you out of the Maze "Once we find the stairs we need to go down, then go up. After that she told us to turn right, go up then go down one more time." Follow this sequence to help with the rune puzzle.
Notice the mechanical switches on the floor and take one character to activate the switch while the rest go through the cell gates leading to the room full of room symbols. From inside the room of runes, interact with the items on the south wall to move them aside and have the last character enter through the gated room and crawl through the now revealed hole. Have each character stand on one rune symbol each to reveal the next teleportation space. The two revealed spaces will take you to the stairs or the arrow pointing left. Follow the journal and first choose the teleportation space with the stairs symbol.
Despite the journal instructions, you will need to take a few extra steps. The sequence is as follows: Stairs, ↓, ←, ↑, →, ↑ ,↓ In that order. This will allow all the arrows on the rune platform to light so you can continue.
Once you take the stairs, Observe the plaque on the wall. After the cutscene, interact with it again to obtain a Depleted Rune. Crawl through to the cell area. Interact with the loot on the ground to trigger a short battle with the ghost. Loot the area again when you are done and you will obtain Adventurer's Notes, Gold Dragon Statuette, Remarkable Arrows, and more Ingredients.
Exit the cell area and enter the Dark space directly north of the cell. You will have to crawl through. This space will also have two teleportation spaces. Before teleporting out, loot the crate in the divided section of the room. Now choose the teleporter with the ↓ down symbol. This will take you to another area full of teleporters. Once you use the down arrow teleporter take the one with the arrow that points to the ← left on the higher floor. Disable the traps in your way. There will be two teleporter spaces in the area and the party members will have separated. Take the character within the center cell gate with the purple glow and trigger the switch inside the cell to keep that gate open. Disable the trap.
Gather the party members and take them to the ↑ up arrow. This will take you to the first area where you encountered the ghost. Return to the room with the teleporters and this time there will only be one available to use. Take the → right arrow teleporter. Take the ↑ up arrow again and then go back and take the ↓ down arrow. That will be the final arrow to light.
Return to the main rune platform with all the arrows. All arrows and symbols will now be lit. Interact with it to continue. This will take you to the next area nearby and will trigger a battle.
Find the Master and the Gem
Complete the Battle against the Skeletal Knights and Archers. Try to get rid of the Archers first if possible. Keep the area well-lit during battle. Loot the area then continue. Head south to the middle rooms and you will encounter a door with a switch. Activate the switch next to the door to continue. There will be basic armor to loot on the ground here as well.
Activate the switches on the ground to get to the corner cell gated area with the staircase. Jump through the stone pillar platforms and get to the end to push the crate and make way. This location is also reachable through climbing. Entering this area will trigger another battle with an unknown creature. Loot after completing the battle and obtain Magnificent Leather Armor, more Adventurer's Notes, Acid, and other sellable items. You now also have access to the rune switch on the floor after he is defeated. While leaving one party member on the switch, take the others through the now open cell gates directly south. You can now go down and have one party member activate the switch in the center room to free the last character and have him join the rest. You can now also all climb down to the next dark area with the flights of stairs and red carpet.
Head up to the second floor. Heading immediately through the first door that leads to the darkroom will take you a step closer to meet with the master. Head to the other door if you want to continue looting and exploring.
Heading through the first door on the left that leads to a completely dark room will lead to a battle against more Skeletons- including a Skeletal Sorcerer. Complete the battle sequence and loot the area. This will give you access to the next set of doors through the room that will lead to the Master. Having any unsuccessful checks will lead to one more battle sequence against Master Mardracht and his minions.
When the battle is complete, loot the area. You will find more Scrolls, Magnificent Bracers, and some ingredients. Enter one of the highlighted areas to exit the area. The Teleporter on the left will take you to a new part of the Castle - the Solar Tower where you can continue to loot bookshelves and gain the Poisoner's Kit if you haven't already. Once you are done with the Solar Tower, take the teleporter back and this time take the other teleporter out. The teleporter on the right will take you outside so you can enter exit the area.
You can now travel to the next Possible Gem Location found on the map Northwest of Caer Lem Outpost.
Gem Quest: The Monastery
- Explore the Ruins
- Secondary Quests: Apostasy
- Inspect the Structure
- Find the Copper Vale of Remembrance
- Return Belongings / Deliver Letter
- Secondary Quest: Visit the Local Scavenger HQ
- Talk to the Ceannard
- Find the Clues
- Find Sergeant Nikannen
- Meet the Baron
- Go to the Basement
- Survive the Ambush
- Free the Real Baron
- Find Kythaela's Belongings
- Go to the Throne Room / Check the Imperial Door
- Explore the Surroundings
- Wait for the Moon
- Find a Way to Enter the Tower
- Enter the Tower
- Find the Gem
- Kill Razen
Once you have arrived at the Tirmarian Ruins, follow the river to the end where the waterfall is. Interact with the large rock ahead to push it down and clear the way. Use the waterfall rocks to cross the waterfall. You will trigger a battle. Complete the battle and collect loot from atop some of the ruined structures. You will find some Scrolls, Ingredients, Potions, Gems, coins, and basic Weapons. When you are done with the area head down towards another set of ruins where you will trigger another Battle against some Goblins. Complete the battle to continue.
Climb the ruined structures in the area. You will be able to find some Ingredients in bushes in the area. Atop the ruins, push over the. pillars to create a path. This will lead you back to a platform on the waterfall. The basket will contain more Gems, coins, a Javelin, and more Ingredients. Toward the northeast corner is another hidden area where you can interact with the boulder to move it and make way. You can now climb and loot the treasure chest on top after knocking over the boulder. Do not miss the crate in the center of the map, as it holds a valuable Faction Relic, Tirmarian Master Smith's Memoirs. All Factions take interest in this particular Faction Relic. This box will also contain three Weapon Recipes. Be thorough with the ruined structures, especially on the lower level. The arches with a collapsable pillar will have an item behind it. You will need to climb over the structure to loot the bush concealing the Journal of Emtan Darwaz, Antique holy symbol and a box. This will be the first step to beginning the background Secondary Quest, Apostasy.
Inspect the Structure
When you are ready, head north towards the large Mausoleum structures. Push the boulder in front of one of the arches. Loot what's behind it. You will obtain a Magnificent Morningstar, Potions, coins, Gems, Scrolls, and a Holy Symbol (Amulet). Inspect the three slabs in front of the Mausoleum and it will tell you to wait for the moon. Take a rest at the Campfire if you want to wait for the moon. If you explore the area, you will encounter a battle against a Minotaur. He will drop a Battleaxe and some potions. In the structure nearby, there will be a chest that will contain an Imperial Mage Report, coins, Gems, Potions, Ingredients, and a Rapier.
When you are done with the area, wait for the moon by taking a rest. The moonlight reveals the symbols on the slabs when you interact with them. Interact with the second and third slabs to complete the puzzle and open the entrance. This will activate a cutscene with the Elf Kythaela who appears to have been there during the Cataclysm but has lost some of her memory. She will speak of the Copper Vale of Rememberance which sounds a lot like today's Coparann. This will be your next destination.
Find the Copper Vale of Remembrance
Fast Travel to Coparann. You will encounter some events on the way. The first of these is the Ashes of Manacalon.
The Oracle
The place seems familiar to Kythaela. Prepare for battle when going through this area. Approach the bridge to trigger a cutscene. There will be a chest in the water. Retrieving the contents of the chest will trigger a battle against some. This chest will contain a rare Ingredient, Diamond of Elai, Diamond, and a Potion. When you are ready, leave the area to continue your journey. You will stop an Imperial Prison - Dungeons of Manacalon.
The Prison
Loot the chest at the end of the corridor. Approach the hall to trigger a short cutscene. Leave the area to continue. She will stop one last time at some caravans.
Explore the Area
Follow the path until you reach a gap. Jump the gap and loot the chests in the area. Reach the caravan area and look for a man called Galar. He will be the only one willing to speak with you. He will be at the southwest corner of the Caravans. Approaching him will trigger another battle. Complete the sequence to trigger a cutscene with Galar. Completing the battle will also gain you access to his gears for sale. He will also ask for a favor. He wants you to deliver a message to Coparann and offers a place to rest. Take along rest and continue to Coparann.
Return Belongings / Deliver the Letter (optional)
Approach the entrance to be greeted. He will tell you to see Sergeant Nikannen who will lead you to speak to the Ceannard first and provide you a note. Ending this cutscene will begin the secondary quest: Visit the Local Scavenger HQ. Locate the Ceannard and speak to him. Your two active objective locations are both indicated on your compass. Next to your location, you can Deliver your Letter by speaking to the man standing in front of the colorful market stalls, Wilf Warmhearth. He is also marked by the "!" symbol to indicate he is part of a quest objective.
Follow the Quest indicator North then east. Enter the building to speak to the Ceannard. After your talk with the Ceannard, you will need to located and listen in on five clues around town.
Find the Clues
Just next to the building you can complete a secondary quest by heading east and entering the fenced area north. Speak to Milan, the leader of the Scavengers in the area. This will complete the secondary quest, Visit the Local Scavenger HQ. Follow the indicators on your compass or open your map to help you locate all five clues.
- A couple of citizens will be south behind a building. They will have a conversation about the Ceannard and the baron. This will be the fourth Clue.
- Pass Joris Nikannen and speak to the same guy who you just delivered the letter to upon arrival, Wilf Warmhearth. He will be manning the market stall and will give you your fifth clue.
- Two citizens, a man and the Jeweler (a tall lady in a long blue dress) are having a conversation. They will provide your third clue.
- Two citizens, the Sergeant and the maid (lady in pink) will be at the corner of the Tavern. Interact with them to eavesdrop on their conversation to obtain the first clue.
- Finally, interact with the Bartender to obtain the second clue.
Once you have obtained all five clues, find sergeant Nikannen.
Find Sergeant Nikannen & Meet the Baron
He will be at the center square close to the entrance. After the cutscene of their discussion, he will tell you to meet the Baron. Enter through the guarded doors north of town. Head up the stairs to locate the Baron. He will be through the large set of doors. After your conversation, report back to the Sergeant. He will tell you to return to the Baron the next day. First, take a long rest before returning to the Baron. This will take you directly into a cutscene with the Baron. He will take you down to the Basement.
Go to the Basement
Head north through the different doors. Once you reach the end of the hall, there will be an available room to your left, enter and loot the chest at the corner to obtain a Dusty Old Book, Book, and some coins. Head back to the hall and this time enter through the cell gates to the right. This will take you into another cutscene. He will reveal the Baron inside the cell. The cutscene will conclude in a battle.
Survive the Ambush & Free the Real Baron
Survive the ambush and defeat the Coparann Guards to continue. Approach the Baren's cell to trigger a cutscene and complete this section.
Find Kythaela's Belongings
Here you will encounter a familiar set of slabs. Solve the rune puzzle to full light the symbols and reveal an entrance. Activate the first, third and fourth rune slabs to reveal the door and interact with it to proceed to the next area. Kythaela will find her spellbook.
Go to the Throne Room, Check the Imperial Door (optional)
Interact with the door directly east to reveal the Imperial Gate and inspect it. Loot the area, and once you are done leave and return to the throne room. Your next location is the Master's Tower. Travel to the Master's Tower west of Coparann.
Explore the Surroundings
Once you arrive at the Master's tower, follow the path and keep left. They will spot some tracks. It would be a good idea to approach the area in Cautious Mode. You will be entering a battle with some wolves. After your battle, go ahead and knock down the pillar. Clear any obstacles in your path and continue forward in the same direction. Once you reach a structure, climb it to knock down the ruined pillar and use it to cross the gap. You can choose either route to reach the tower. You may encounter another battle against a Tiger Drake. Their defeat will earn you some Tiger Drake material Ingredients. Continue exploring and making your way through the area until you reach a large circular stone platform. You will encounter another set of puzzle slabs to solve. As you continue, be prepared for battle.
There will be a bench just to the left of the rune puzzle slabs. Take a rest and wait for the moon to reveal the symbols. Interact with either one first.
- On the right side, activate middle, first, then third
- Left side, interact with the first and third slabs
Completing the symbol will trigger a battle against the Brood of Blood. When you complete the battle, continue solving the last remaining rune puzzle to gain access to the tower. Next, enter the tower. Explore the area and once you're ready, interact with the platform to be taken to another area.
Find the Gem
Explore each room. as they will all have something to investigate. The entrance to the Library/Study will contain plenty of Recipes for looting located in the midst of the bookshelves. Check the upper bookshelves as well. Highlight the area to make sure you didn't miss any interactable items. To enter the locked Laboratory, there will be a switch in the Library. It can be found on the northeast corner where a ghost creature will be lingering. When activated you will hear a mechanical switch and now you can check if the gates have been opened. The last room will begin a battle against some Spectral Servants so be prepared. There will be a chest in the room but beware of the trap that protects it. The chest will contain a Magic Weapon Request, a Faction Relic interested by most Factions, Crafting Wardenblade Recipe, and a stone. When you are finished with the area, proceed down the bridge to the north and prepare for battle. This will take you into a cutscene.
Kill Razen
Enter the battle and Kill and the other creatures to progress. This is the final objective. Your victory in battle will trigger a cutscene and once it ends, this Main Quest ends and begins the Path to Glory. During the dialogue, Adresteia the dragon will ask for a favor. Completing the cutscene will begin the Secondary Quests: Shadow of the Defiler.
Shadow of the Defiler: Find Razan and destroy him!
- Adrasteia asked you to find the defiler who nests nearby her tower. Return to the ruins outside the Fortress of the Shield, find the tomb where Razan placed the remains of his family to lure him, and put an end to his existence.
Video
[video]
Map
[map]
Trivia & Notes:
Trivia and notes go here
Information
- Previous: Gem Quest: The Monastery
- Location: Caer Cyflen
- Next: The Missing Piece
- Recommended Levels: ???
Video Playthrough
[video]
Maps
[maps]
Path to Glory Quests
- Shadow of the Defiler
- Heritage of Distrust
- Arwin Merton's Story
- Bitterroot's Treasure Map
- The Nature of Evil
- Ancient Knowledge
- Family Reckoning
- Shadow of the Past
- The Collector
- Runs in the Family
- Hickory Corner Wood (Quest)
- Temple of the Lost Gods
- Wartime Treasure
- Family Reckoning
- Sorak Relic
- Goblin Culture
Items
Consumables & Tools
- Dust of Disappearance
- The Long Night
Equipment & Ingredients
- Oil of Acuteness
- Leather Armor +1
- Breastplate +1
- Magnificent Belt
- >Golden Bracers
- Magnificent Dagger
- Lava Stones
Enemies
- Orc Berserker
- Orc Chiefton
- Orc Archer
- Orc
- Pilgrim
- Fire Spider
- Spectral Avenger
- Skeletal Knight
- Skeleton Archer
- Skeletal Sorcerer
- Badlands Wraith
- Sorr-Akkath Saboteur
- Sorr-Akkath Acolyte of Sorr-Tarr
- Sorr-Akkath Assassin
- Fire Elemental
- Fire Osprey
- Spectral Spider
- Zealot
- Phase Spider
- Goblin Cutthroat
- Goblin Shaman
- Dire Wolf
- Ghoul
- Badlands Ghast
- Crimson Spider
- Tiger Drake
- Minotaur
- Air Elemental
- Earth Elemental
- Green Dragon
- Cube of Light
- Spectral Servant
NPCs
- Mayor Kiaradth Bright-Spark
- Captain Verissa Ironshell
- Galeafin Pureheart
- Kebra
- Arrok
- Brok
- Mildred Warmhearth
- Rogrok
- Orc Beastmaster
- Drew
- Lyria
- Adria
- Arbal
- Illoreth
- Bradford Ravensworth
- Eldorath Smooth-Tongue
- Zhoron Master of Conjuration
Path to Glory Gem Quests Walkthrough
Path to Glory
- Return to Caer Cyflen
- Go to the Council
- Visit the Residence
- Secondary Quest: Shadow of the Defiler
- Secondary Quest: Heritage of Distrust
- Secondary Quest: Arwin Merton's Story
- Secondary Quest: Bitterroot's Treasure Map
- Secondary Quest: The Nature of Evil
- Gem Quest: The Cradle of Fire
- Gem Quest: The Mind of the Master
Return to Caer Cyflen
After the defeat of Razan from the Gem Quest: The Monastery, complete the cutscene and return to Caer Cyflen.
Go to the Council
Go to the Council to report back your findings. The Legacy Council asked you to continue your request, though the Crown might have dangers powers as it belonged to Kaseinax, Eternal Soul of the Eight Traditions, the last Magister of the Arcaneum - the most powerful wizard of the Manacalon Empire. It might have a link to the Rift - and, therefore, to the Cataclysm.
Visit the Residence
This will be a good time to activate or progress in any available Secondary Quests in the area.
- Shadow of the Defiler: At any point, if you haven't returned to the Fortress of the Sheild yet as per Adresteia's request, you may return to finish off Razan and complete this secondary Quest.
- Heritage of Distrust: Before visiting the residence, visit the quest board for any available secondary quests you might want to work on. Speak to Mayor Kiaradth Bright-Spark at Sunblaze court to begin the quest.
- If you wish to continue with the quest, the Tannerson siblings, Drew, Adria, and Lyria will be in the area in Caer Cyflen. Speak to them to continue. Your next step for this quest would be to visit the Tannerson Estate. Now is also a good time to check the quest board to activate any available Secondary Quests. Other quests to progress in:
- Arwin Merton's Story: If you have already encountered Bitterroot in Coparann, the next step would be to visit Arwin Merton in Gravekeep's Cask.
- Bitterroot's Treasure Map: Bitterroot would have also given you a map that leads to the Silent Whisper Outpost. Pursue the destination to progress in the quest.
Once you are done, continue towards the residence. Speak to Butler Bradford Ravensworth to enter the Residence.
You have been offered a place to stay at the palace. Visit the Residence to continue and a short dialogue will begin. Ending the cutscene will also begin the Secondary Quests, The Nature of Evil.
- To proceed with the Secondary Quest: The Nature of Evil, speak to Mayor Kiaradth Bright-Spark, who be at the Sunblaze Court in Caer Cyflen.
To proceed with the Main Quest approach Captain Verissa Ironshell, who will also be at Sunblaze Court, in order to enter the residence. Loot the area with the first opening to the West to obtain an Oil of Acuteness, Leather Armor +1, Breastplate +1, >Magnificent Belt, Golden Bracers, and a Magnificent Dagger.
Once you are ready take a long rest. This will initiate two other Gem Quests to complete in order to complete Path to Glory.
Find the Remaining Gems
To Proceed with the available Secondary Quest in the area, travel to Galeafin's House next to Market Street in Caer Cyflen to proceed with The Nature of Evil. Then, wait for Galeafin to call you again. Take the High Town Exit to leave the area and proceed with the Gem Quests.
Gem Quest: The Cradle of Fire
- Reach the Volcano
- Explore the Volcano's Surroundings
- Talk to the Orc Shaman
- Free Brok
- Get Past Arbal
- Choice: Visit the Bloodspear / Sandraven / Bladefang Tribe
- Find the Old Queen
- Return the Holy Axe
- Go through the Redscar Gate
- Explore the Necropolis
- Choice: Steal the Key /Choice: Use the Minor Gate
- Return to Urka
- Defeat Urka
- Join Brok behind the Redscar Gate
- Face Arrok /Defeat Arrok
- Escape from the Erupting Volcano
Reach the Volcano
Travel to the closest unlocked destination in order to make the shortest journey towards the Volcano. Suggested: Coparann. Once at the Volcano, travel north.
Explore the Volcano's Surroundings
Loot the crates in the area shown by the revealed map while progressing north towards the blinking quest marker indicated on the compass. There are plenty of Lava Stones that can be found in the area used for Crafting fire items. Another crate will contain a Scroll of Darkness, Longsword +1, Arrow x5 and a Brother Letter. Upon reaching the quest destination. You will come across an area full of bodies and an Orc Shaman.
Talk to the Orc Shaman
Approach the Orc Shaman to trigger a cutscene with Kebra. She talks about the conflicts of the tribes and how Arrok had harnessed the power of fire and imprisoned Brok, the chieftain of Suncloud when he refused to bend the knee. He then burned everyone else. She mentioned that he found the power of the Cradle of Fire in the heart of the mountain. This led the characters to believe that he has obtained the Gem of Evocation.
Free Brok
Before exiting the area. Loot the crates in your surroundings for some coins, Torches, Ration Pouches, and more Ingredients. Double-check the map for any unopened bootable areas then proceed through the interactable area to move on. Continue north until a cutscene is triggered.
Get Past Arbal
Your options are to talk, fight or sneak past him. Approach Arbal in Cautious Mode. You will have an opportunity to talk to him and decide your next move. Ask him to step aside and attack first to initiate a Surprise Attack. Continue north until you reach another Battle Sequence. Use the environment to your advantage by shooting down any hanging objects when enemies are underneath, and prioritize killing the archers first. Complete the battle to continue. Loot the and as a precaution, explore the area in Cautious Mode to locate any traps nearby. Reach the next interactive area above to free Brok and trigger a cutscene with Brok. He will mention the sunken Elf Empire inside the volcano.
Take the Elevator
Loot the area before you continue. There will also be a campfire available to take a rest if needed. Proceed to the interactable area and leave to continue.
Choice: Visit the Bloodspear Tribe
Choice: Visit the Sandraven Tribe
Choice: Visit the Bladefang Tribe
- Bloodspear Tribe
Continue forward until you reach the lineup of flags to trigger the next cutscene revealing the Bloodspear symbol, representing the Bloodspear chief Edrof, a champion who only respects strength. End the cutscene and you will still have the option to choose which tribe to challenge. Once you challenge a tribe, you must now choose a challenger amongst your party members. Prepare your character for battle, choose your weapon from the weapon rack then approach the center of the combat ring to initiate the combat sequence. Complete the sequence to trigger the next cutscene. The defeat of the tribe leader will result in the election of Brok as chief of that tribe.
- Bladefang Tribe
After the defeat of the first tribe warrior, you will be asked to confront the rest and gain their allegiance. There will be two other blinking quest markers available on your compass. There will be a Merchant and a Campfire in the area to stock up and rejuvenate before the next battle. Check your map for the next approachable area and travel to the next destination to reach the next tribe. Approach the burrows down the west side of the bridge and proceed to start another battle against some Pilgrims and other unknown creatures. Head through the doors north to reach the Bladefang tribe. Radulf of the Bladefang will task the adventurers to bring back the holy axe of the ancients. Kralshe-Renn 'Old Queen' has the holy axe in the lair. You will then need to locate her and defeat her in battle. The Holy Axe was from an ancestor of the orcs. Legends says it brought them back from the Endless Range.
Find the Old Queen
There will be a mother Campire resting spot here if needed. Proceed through the original set of doors on the west to continue. You will need a light source to observe the area. The adventurers will notice the webs in the area. When the clip concludes, continue towards the darkened areas and locate the fire pits in order to light the areas. Once you reach the separated platforms, prepare for a battle against Fire Spiders. Complete the battle then continue west. A clip will reveal the Old Queen. Tactically approach the area with Caution. Attempt to light the area as the Spider Queen hates light. Also, be aware of the Spiderlings in the area.
Return the Holy Axe
Once the queen is defeated search the area for loot and Ingredients, you should be able to take more Lava Stones and Spider Queen Venom, a valuable ingredient used to craft an enchanted weapon, Black Viper. When you are done with the area return to the Bladefanng Tribe and return the Hole Axe to gain their loyalty.
- Sandraven Tribe
The Sandraven Tribe will be back through the southern doors. Follow the Quest marker through the undiscovered areas till you reach a fence and an Orc Shaman named Ukra. Kebra will mention that he likes to read and collect old Elf antiques. He will ask you to bring back the Emperor's Key from Sentharyllian down in the Cradle of Fire.
Go Through the Redscar Gate
Keep an eye on the new blinking quest marker and check your map for the location of the Redscar Gate. Head through the unlocked doors and continue through the hall to the next set of doors.
Explore the Necropolis
Once you go through the doors with the stairs heading down approach with caution as there are a few enemies in the area. Initiate the attack first before being spotted to start with a Surprise attack. Complete the battle to continue. Loot the area before you move on. Just above the stairs on the east side, there will be an interactable wall. Open it to reveal a lootable tomb. The tomb will contain a Gear-Shaped Shield that once identified will be determined to be the Cog of Cohh, Chain Mail, Elven Shortsword, Arrows, and a Shortbow. Continue towards the quest marker until you reach the tomb in the center.
Choice: Steal the Key
Choice: Use the Minor Gate
This will trigger a cutscene with Emperor Leather. Fail the check and it will immediately trigger a battle sequence. Kill the emperor to steal the Key.
Return to Urka
Before you exit the area, prepare for another battle. Once you exit the area, Urka will be waiting for you and a cutscene will begin. Urka's initial motive was to send the adventurers on the quest for the key in order to weaken them for battle against Urka and the Orcs as since wants the crown for himself. Be aware that this battle will have a lot of invisible creatures. Defeat Urka to continue.
Join Brok behind the Redscar Gate / Face Arrok
Return to Brok to trigger a cutscene and prepare for the next battle against Arrok. Take a long rest if needed. Head through the doors when you are ready. Immediately after the cutscene, a battle will ensure. Be prepared to face the different fire creatures. Defeat them to continue
Escape from the Erupting Volcano
You will still have time to loot the surrounding area before you go. You will be able to find Primordial Lava Stones, Beautiful Boots, and a Magnificent Quarterstaff. When you are ready, head west then north across the lava pit. There will be an interactable space for you to enter the next area. Exit the area to complete the quest. Fast Travel to the Volcano exterior then exit the area to continue.
Gem Quest: The Mind of the Master
- Reach the Lava Forest
- Find your way to the Gem
- Enter the Shed
- Find a Way Out
- Secondary Quest: The Arena
- Find Another Fragment of the Gem
- Enter the Manor
- Follow the Housekeeper
- Secondary Quest: The Escape from the Manor
- Secondary Quest: A Very Tempting Place
- Secondary Quest: A Well-Ordered Room
- Fight the Master
Reach the Lava Forest
Fast Travel to the Lava Forest. Move forward and make your way north. Proceed with caution as there are traps in the area while hacking through any obstacles. Continue until you reach the Lava River. This will be added as a waypoint location. Prepare for battle and proceed with caution. There will be more traps along with Fire Elemental, Fire Spider, Skeletal Marksman, and Skeletal Knight Enemies in the area. Some unreachable traps can be disarmed by shooting at them. Complete the battle to continue.
Continue towards the blinking quest marker from your compass to progress to the next area. Take a rest if needed. You should be heading in a general west direction. Be prepared as you may encounter more than one battle sequence on this trail through the forest. You will eventually come across a shed and the Soraks.
Enter the Shed
There will a campfire in the area. Take a rest before entering the next area. If not, there will be a campfire just inside the shed area to take a rest as well. You will eventually come across a Veteran and trigger a cutscene.
Find a Way Out
You will reach a glowing gate. A voice will tell you that you are not worthy to enter. If you head north, have a light source with you as these areas will be dim. There will be another battle sequence as you continue. Stay well lit to have an advantage as they are vulnerable to "radiance." To move on, head south. There will be some lootable containers that will require some climbing. These will contain more ingredients and Arrows. Approach an area glowing green to trigger a cutscene and interact with the glowing area.
- Interact with the pillar again to trigger the Secondary Quests: The Arena. Your objective is to defeat your opponents. Once the first round of opponents is defeated, more waves of different enemies will arrive. There are four rounds in total and you will still have the option to leave the arena at any time to discontinue the secondary quest. When all four rounds have been completed, leave the area to complete the quest.
Exit the area
Loot the chests at the exit to receive some Beautiful Boots, a Ruby, and a Shield +1. Go through the exit, interact with the glowing switch to activate the first part of the gate. Continue heading up the platforms. Climb the southern platform and make your way up north until you reach an area with a block. Interact with the block to move it and crawl through. then Interact with the wall. After both switches have been activated, return to the main gate and it will open. You may want to return to the campfire area and take a long rest before returning as there will be a battle ahead. Interact with the chest to initiate a battle sequence. You will be facing Air Elementals, and Earth Elementals. Stay away from the edges to avoid getting shoved off. Once you finish this battle sequence, you can move on through the next gate and it will reveal the Green Dragon.The end of the cutscene will begin the battle against the Green Dragon.
The battle against the Green Dragon should be fairly easy to complete. When it is done, the adventurers will conclude that there must be another master that survived the Cataclysm who is also trying to protect the Gem when they obtain only a fragment of the Gem. If you return to the chest in the previous room to loot it, it will contain a Magnificient Shield that provides +2 to AC. When identified, it will be revealed to be Brightwall. Interact with the Dragon's Treasure and it will take you to the next area.
Find Another Fragment of the Gem
Cross the platforms going west until you reach the Cog with the four platforms. Place your adventurers on each platform to activate the moving platforms and it will give you a path to the chest. This chest will contain a Mithral Stone, and an Encrypted Spellbook, a Faction Relic will be a valuable piece to the Circle of Danantar.
When returning, keep two members at the second platform and place them over the two fire platforms. Send the other two on the opposite side, returning to the gear are with the four platforms and this time crossing south. There will be two more fire platform switches. Activating all four will rotate the middle platform. have one party member exit and enter the platform twice for the center platform to rotate a total of three times. Take the now available stairs and climb up the center platform to activate the two switches on top with two party members. Then, move on and continue south till you reach the interactable space. this will trigger the next platform to form ahead and they will begin a short cutscene. Be ready for a quick battle against the Cube of Light ahead that will begin as soon as you cross the platform. Interact with the Gem Fragment left behind by the cube and it will take you to the next area.
Enter the Manor
Head north towards the docks over the dried water. Once you reach the large circle platform, prepare for battle as there are enemies in the area and you will potentially go into combat. Note the book in the middle of the platform, Tome of all Things. If you take it, you will be asked to return it. Then, approach the manor to the west of the platform. Interact with the doors and if you had taken the book, the voice will ask you to return it. When you go through the doors, the Spectral Servant will be there to welcome you. She will address the crown bearer as Master Kaseinax.
Follow the Housekeeper
Follow the Housekeeper and enter the doors after her. She will lead you to the last room on the left. It will be the dining all. After the short dialogue, feel free to loot the area before moving on through the doors on the right. Instead of following the spectral servant, head up the flight of stairs and through the doors ahead to enter a cell area.
- Heading into the upper room will begin the Secondary Quest, The Escape from the Manor. This will lead to two choices: Free the slaves or go on your way. If you interact with the cell gates, you will free the slaves and immediately complete the Quest.
When you are finished exploring the area, continue to follow the Spectral Servant into the next room. There will be a Long Rest area available for you. Take a long rest then, rather than continuing to follow the servant, take a look at the room to the right on the eastern wall.
- Entering this room will begin the Secondary Quest, A Very Tempting Place. You will have two choices to proceed with the quest. Check the Place or Go on Your Way. Looting any chests in the area will complete the quest. The chest to your right with the Spectral Servants nearby will contain Strange Oil and Life Stone.
When you are finished, continue to follow the servant and cross the bridge. This will eventually lead you to a corner. Go ahead through the doors on the northern wall.
- Enter the room to begin the Secondary Quest: A Well-Ordered Room. You will be prompted with two choices once again: Help the Servant to Clear the mess or go on your way. Interact with the desk mess and it will clear the Quest.
The next room the Servant will lead you to is the final room. Enter the room to trigger a cutscene with the Master, Zhoron. When he realizes you're interested in the Gem. he will initiate a combat sequence. Complete the battle to continue. Clear the Spectral Servants and interact with the statues linked to the Master. Once you successfully take down all the statues, the Master will assume his Green Dragon form. Complete the battle continue. Once the dragon is defeated take the gem and you will be taken outside. This will end the Main Quest: The Mind of the Master and take you into The Missing Piece.
Completing quests and locating both gems from Gem Quest: The Mind of the Master and Gem Quest: The Cradle of Fire will complete Path to Glory as well.
Video
[video]
Map
[map]
Trivia & Notes:
Trivia and notes go here
Information
- Previous: Path to Glory
- Location: Caer Cyflen
- Recommended Levels: ???
Video Playthrough
[video]
Maps
[maps]
The Missing Piece Quests
Items
Consumables & Tools
- Ration Pouch
- Potion of Giant Strength (Cloud)
Equipment & Ingredients
- Magnificent Shield
- Magnificent Longbow
- Magnificent Mace
- Mace +2
- Longbow +2
- Shield +2
- Cloth of the Lightbringers
Enemies
- Veteran
- Sorr-Akkath Assassin
- Sorr-Akkath Acolyte of Sorr-Tarr
- Sorr-Akkath Shikkath
- Sorak Infiltrator
- modern Kyre
- Fire Spider
- Fire Elemental
- Badlands Wraith
- Air Elemental
- Sorr-Akkath Warrior
- Sorr-Akkath Skirmisher
- Sorr-Akkath Abomination
- Sorr-Akkath Tshar
NPCs
The Missing Piece Walkthrough
The Missing Piece
- Return to the Manacalon Ruin
- Report to the Council
- Take a Long Rest
- Talk to Heddlon Surespell
- No Way Back!
- The Dark Cult
- Go to Earcorn
- Search Earcorn
- Fight the Soraks!
- Return to Caer Cyflen
- Find Halman Summer
- Go to the Council Hall
- Search Halman's House
- Bring Documents to Carran
- Rush to the Temple
- Fight all the Infiltrators!
- Find the Crown!
- Take a Long Rest
- Use the Major Gates
This Quest is activated once Path to Glory is completed and both Gems are obtained.
Return to the Manacalon Ruin
Exit the Lava Forest area. Take a long rest if needed, then enter the interactive square to Fast Travel to the Manacalon Ruins. A short dialogue sequence will occur and nothing will happen. You returned to the ruin but nothing happened. It made it clear to you that you could not complete the quest.
Report to the Council
It seems your quest cannot be completed; you cannot lie to the Council about it. Return to Caer Cyflen and report the situation. Fast Travel back to Caer Lem to report to the council. While in the area, check the quest board for any updated Secondary Quests, then head to the council to report your findings. They will hold a meeting discussing further plans of the Crown. When the meeting ends, Heddlon Surespell will advise you to spend the night at the Gravekeep's Cask instead of the Residence.
Take a Long Rest
Your next task will be to take a long rest. You could take his advice and stay at the Gravekeep's Cask instead. If you rest at the Inn, your adventures are safe for the rest and you will receive news of the attack on the Residence. If you choose to enter the residence, you will be immediately attacked and taken into a battle sequence as soon as you enter your rooms. If you choose to go ahead and enter the rooms, complete the attack to continue. Loot the area when you are finished.
Talk to Heddlon Surespell
Heddon Surespell will be on the upper floor of Graveskeep's Cask. Walk or fast travel to the destination and speak with him.
No Way Back!
The Council Meeting will continue the next morning. The Council had come to the consensus that they believe the Crown should be secured and surrendered by its current owners, the adventurers. They will continue to argue for the cutscene.
The Dark Cult
Once the meeting has its recess Halman Summer will have a word with the adventures. He will share information on a man that has been spotted with a tattoo heading into Earcorn. Halman Summer told you about a possible Coven of Arivad in a nearby village. Considering the recent actions of the Soraks, it may be an outpost for their operations in the capital city.
Go to Earcorn & Search Earcorn
Take the exit out of Caer Cyflen and enter Earcorn. Once you have arrived, enter with caution. Follow the tracks if you spot them. Head south to follow the trail. Be aware of any enemies and stay close to hiding places if you don't want to trigger a battle. If you've been spotted, make the attack first to initiate a surprise attack.
Fight the Soraks!
Complete the battle to continue. The battle will end with a cutscene. They believe that this setup was a trap.
Return to Caer Cyflen & Find Halman Summer
Loot the area and when you are done, return to Caer Cyflen. Look around and talk to people in the area. While looking for Carran at the Legacy Council, you will come across Daliat Sunbird. Heddlon Surepell will also arrive looking for Halman Summer. It appears that he has gone missing.
Go to the Council Hall
Continue to the council to find more information. Carran will inform you that the Tower of Knowledge delegation has been poisoned and the Crown is currently kept at the temple of Einar. Gallivan takes this as an attack. Carran will lead you to the next destination informing you that Halman has a mansion in town next to the Circle of Danantar.
Search Halman's House
Travel near the Circle of Danantar's Headquarters. Approach the blockade area and it will trigger a short dialogue. Once you're inside take a look around until you reach his room with bodies.
Bring the Documents to Carran
Travel back to the Legacy Council to report back to Lord Carran. He has informed you that the poisoned 30 people are being kept in the temple where the Crown is and they are paying to have them resurrected.
Rush to the Temple & Fight all the infiltrators!
Speak to Marshal Beric Sunblaze. This will take you into battle when you barge into the next room. Defeat the Sorak Infiltrators to continue. Marshal will give you the Temple Keys that will take you to the Crown.
Find the Crown!
Follow the light. Keep heading west through the doors. When you get to the Crown Room, the crown will be missing, but you will discover a secret passage. Head into the passage to exit the area and it will take you to the city's Imperial Gate. Arwin Merton and Leira Kean will already be there. Princess Ceiwad Silverflower will appear and assume the form of the dragon. She will clear the room and tell you to take a rest.
Take a Long Rest then Use the Major Gate
Take a long rest at the designated spot. Loot the equipment. Identify the equipment the princess has left you. Use the Major Gate when you are ready.
Aer Elai
- Exit the Lava River
- Climb up the Mountain
- Find the Bone of the Magister
- Leave the Bone Yard
- Find a Way Through
- Cross through the Mist
- Explore the Palace
- Approach the Rift
- Defeat the Tshar
- Hold the Line
Exit the Lava River
Step into the interactable space and a short scene will show followed by a combat sequence. Completing the combat will take you to the other side of the river
Climb up the Mountain
Take the ladders south. Move the block out of the way and you will reach the top of the mountain.
Find a Bone of the Magister & Leave the Bone Yard
Atop the mountain, you will come across another battle. Another cutscene will follow. They were destroying bones. They are destroying the remains of the Arcaneum which they found to all have a dragon form. Search the area for the Bone of the Magister. There will be plenty of bones around, but the bones that you are looking for are directly north next to the ribcage set. You will then be able to move on to the next area. Leave the Bone Yard.
Find a Way Through
Approach the area with caution. You will come across another battle. Complete the battle to continue. Then, cross the river. Head west toward the blinking quest marker on the compass. Move down towards the block. There will be loot in the corner. The Sack will contain a Crafting Scroll of Fireball and Scroll of Raise Dead. Continue west towards the marker. Push the pillar over below so that it rises and creates a path. Head back up and push the other pillar down. No return to the upper platforms and knock the dead tree over and use the pillars to cross the path. Make your way to the glowing space to enter the next area.
Cross through the Mist
Follow the marker heading south. Prepare for battle and approach with caution. There will be Air Elementals in the area so prepare to make a surprise attack if you can. When you have completed the battle, cross all the way to the last platform to cross through the mist and enter the next area.
Explore the Palace
Take your time here as there will be no combat in the area. Move forward and push the block, climb up the wall and push the last pillar over. Push the other pillar on the south wall to be able to loot the crate. This crate will contain a Potion of Giant Strength (Frost), Potion of Greater Healing, and Flash Bolt x 20. Continue towards the marker, climb the short wall and there will be a set of pots to loot. This will contain more potions. Climb up the larger walls and push the two pillars over to get everyone across. There will also be a chest towards the side with another scroll and a potion. This will take you towards the next location marker.
Approach the Rift
Make sure you save your progress then push the first pillar over. Then hop over to the next platforms and continue pushing pillars over to create a path for your party members to cross. Do this until you reach the flights of stairs. Cross the long path and enter through the arch to reach the Rift and the Crown.
Defeat the Tshar & Hold the Line
Approach the battle with caution, then initiate a surprise attack. Defeat the Tshar and complete the battle then a cutscene will begin. The Magister will arrive and tell you to hold as he closes the rift. This will begin another battle. Hold the line and continue attacking until a cutscene interrupts and the Magister has successfully closed the Rift.
Video
[video]
Map
[map]
Trivia & Notes:
Trivia and notes go here

Will you be adding a walkthrough for the new Lost Valley campaign?
2
+10
-1