Walkthrough for Solasta Crown of the Magister Lost Valley DLC features a detailed guide that aims to help players complete all new Locations and and added campaign content, as well as guides on Enemies, NPCs, and Items that are encountered in the game. This walkthrough will cover a detailed step by step process through the main campaign of the DLC then guide players through the Faction questlines.
Journal
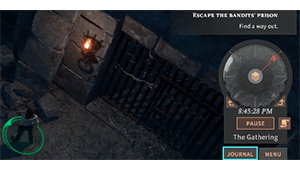
Click on the Journal button to open the quest log, which is at the bottom right of the screen. This will give you information on your current objectives, along with some useful context. Note that the Journal contains much more information than the quest log such as the Bestiary on Enemies and Factions.
Quest Log
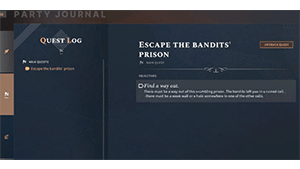
The log lists your current objective, which you must complete in order to move the quest forward. You may also have other, optional objectives. The log also gives you hints and context to help you understand the subtleties of your quest. Your successes and failures are all recorded here.
Solasta Lost Valley DLC Walkthrough
Secondary Quests
- Archeology
- Precious Paper
- A Furry Task
- The Underground Ruins
- The Blocked Cave
- The Lord Protector
- The Secret of the Swamp
- The Witch Hunt
Giant Questline:
Secret Facility:
Faction Quests
Forge Quests
The People Quests
General Information
- Previous: n/a
- Next: The Emerald Forest
The Merchant Road Map
[map]
NPCs in the Area
Secondary Quests
Rewards and Loot
- EXP
- Dwarven Primrose
- Angry Violet
- Small Smith Toolkit
- Projectile Parts
- Arrow
- Brown Bear Pelt
Enemies
- Enemies
Notes
- Notes go here
The Merchant Road Walkthrough
The Merchant Road Main Mission Objectives
- Speak with Galar
- Talk to Lady Fairblade
- Talk to the Nobleman
- Explore the Area
- Report your Findings
- Level Up
- Careful Exploration
- Follow the Tracks
- Escape the Nest
- Follow Ving's Tracks
The Merchant Road Walkthrough
Speak with Galar
Speak to Galar Goldentongue. You asked Galar about the people who set camp nearby. He asked you to find out who they are and why they're here. This quest begins at the Coparann merchant caravan camp. Conclude your interaction and speak to the rest of the NPCs in the area.
- Talk to Lady Fairblade
- Talk to the Nobleman
- Explore the Area
Speak to Leyrin Catpaw to begin an additional secondary quest, Archaeology. Speaking to Helia Fairblade will also begin the secondary quest, Precious Paper. These quests can be completed alongside the main quest. Instructions for both secondary quests will be included in the walkthrough so that all three quests can be completed together.
Once you speak to the NPCs in the area, you may take the party and proceed to the next area. Ascend down the cliffs towards the north. While tracking the quest you may have an indicator on your hub that will show the general direction you need to go. Descend the cliffside and descend once more before crossing to obtain some Materials. Be sure to continuously check the cliffside so you don't miss any Materials.
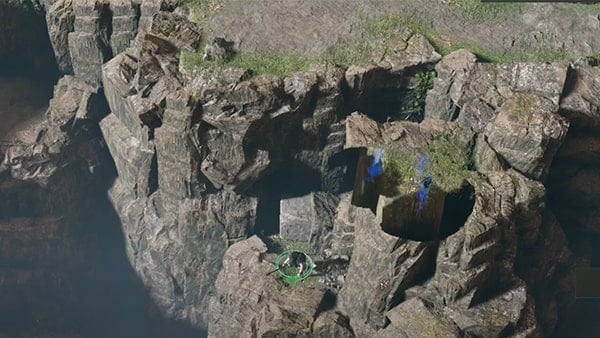
You should be able to obtain a Dwarven Primrose from the first cliff. Climb back up, leap over the gap, and descend again twice to obtain x4 Angry Violet. Continue down the path north and observe a tower of blocks. This will be one of the artifacts needed to complete the Archeology quest. Before moving on, observe the area and interact with the platform towards the cliff edge. This platform should collapse allowing you to interact with the block boulder below. Climb down to loot the corpse below to obtain Small Smith Toolkit, Projectile Parts x3, Shield, Arrow x7. Once you are done, you can take the party and move them onto the glowing square on the path to enter the cave.
- New Waypoint Added: Grotto Exit, Abandoned Campsite
Cross the first gap and observe the structure on the left. Facing north, it should be towards the west side of the first platform. The base of the broken pillar is another Artifact for the Archeology secondary quest.
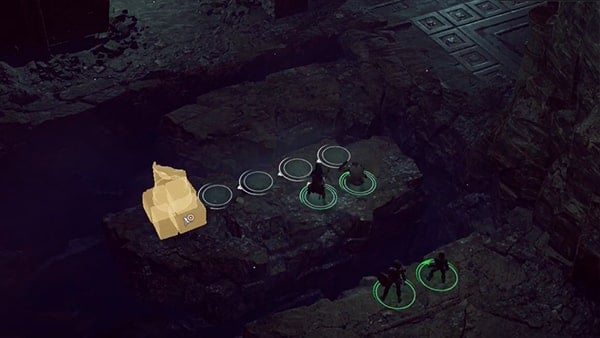
Cross the second gap and search the corners of these rocks. Approach this area with caution since the stalactites from the cave can potentially fall and cause damage. You should be able to find Acid x2, Goblin Hair Fungus amongst the corners of the rocks. This is also where the final Artifact will be for the Archeology quest. It will look like a broken pillar. Diagonal from the pillar is a searchable basket that will contain some coins and Green Book.
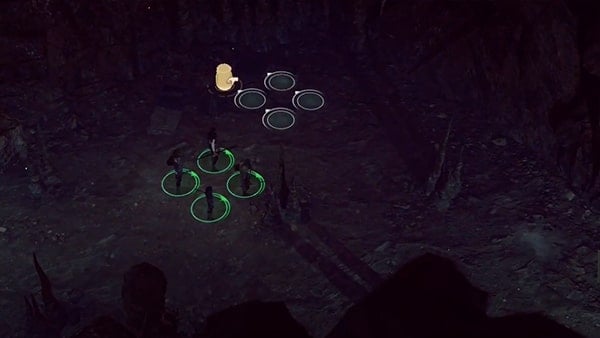
This will prompt the next objectives for both The Merchant Road quest and the secondary quest, Precious Paper. In the same area, search the location until you come across a Brown Bear. Initiate a battle against a Brown Bear in order to obtain its Brown Bear Pelt. This will begin a new secondary quest, A Furry Task.
Report your Findings
A Quick cutscene will begin after obtaining the Green Book. You may now return to the caravan camp indicated by the blinking marker on the HUD compass. Exit the cave and follow the path back.
- Speak to Leyrin Catpaw to complete the Archeology Quest.
- Speak to Krim Sunsail and trade him the Brown Bear Pelt to potentially gain a Boots of the Winterlands Recipe. This will also complete A Furry Task.
- Speak to Helia Fairblade with the Green Book to complete Precious Paper.
Speaking to Helia will also complete this objective and your relation with the Principality of Masgarth will improve.
Level Up
There will be a fire nearby. Take your party and rest to level up and complete this objective.
Careful Exploration
You may enlist one of the NPCs in the area as a companion. They will be able to join your party. Return to the grotto area, taking the same route. Approach the area with caution to be able to reveal the hidden tracks that will show the passage into the next area. Follow the tracks and continue the path and reach the door ahead. Take your party into the travel space and interact with the set of doors until the platform behind you falls.
- New Waypoint Added: Ruin Entrance
Follow the Tracks
Follow the tracks through the set of doors. Continue proceeding with caution. Your party will face two directions eventually forcing you to either move forward or left. Turn left to be able to loot the corpse ahead which will contain x1 Handaxe, Breastplate, Scroll of Ray of Enfeeblement, and a Shield. Turn the corner to initiate a cutscene. A new tutorial pop-will then appear to remain cautious.
- Remain Cautious!: Sometimes you'll come across monsters that are far too powerful for your party. You don't always have to fight, though. Try to remain in cautious mode and avoid them at all costs. Otherwise... well, it's your life.
Escape the Nest
Remain cautious and take two party members to step on both symbols on the floor at the same time. Once the next passage opens, you may continue through. You may need a light source to clearly check your surroundings. In this area, you can hop atop the broken pillar so that one party member can cross to the small platform. Interact with the object on the platform to gain some experience. Return to the rest of your party and then head to the crevice east. Continue east and there should be a highlighted interactive block boulder. Interact with the large boulder block. Before crossing, loot the crate against the wall. It will contain x1 Honored Stone, Jade Pendant.
Continue across the pushed block to hop on to the next platform and then cross over the next gap. If you head east and reach another set of doors, there will be another object across it to interact with that will give you more experience. Get through the set of doors to see another set of doors on the wall to the left and a hall to the right. At this moment, this door cannot be opened. If you linger in this area, some Ghouls and Skeletons may approach from the hall to the right. This will trigger a battle. Clear them and then to the south section. There will be hidden areas in the dark that you can climb up. There will be another object to interact with atop this area and will require an Arcana roll. Your party will gain experience.
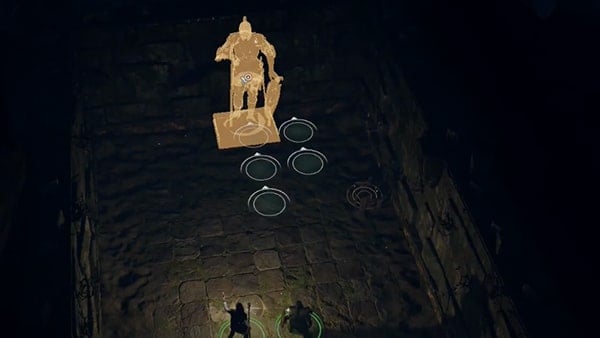
Climb down and then you can take the opposite path which will lead you to a knight statue and a dead end. Interact with the figure for more EXP. There will also be a lootable crate which will contain a Strange Key, Gold Locket, Handaxe, and Sword. With the Strange key, now you can return to the locked set of doors and open them. This will add a new waypoint to your map. This will lead to the nest Exit. Take your party into the exit area to trigger the next cutscene.
- New Waypoint Added: Nest Exit
Follow Ving's Tracks
If you continue down this route, you can expect to be greeted by another Battle sequence. You will be going against a horde of gorillas. When they are cleared, go through the arch and there will be another travel box. This will lead you to travel to the Valley next. Traveling to the Valley will complete The Merchant Road and begin the next quest, The Emerald Forest.
General Information
- Previous: n/a
- Next: Escape the Lost Valley
Emerald Forest Map
[map]
NPCs in the Area
Secondary Quests
- The Underground Ruins
- Meat Boy
- The Blocked Cave
- The Missing People
- A Trusted Carrier
- The Wolf Menace
- A New Cushion
- A Small Favor
- A New Seat
- The Lost Giants
- A Giant Step
- Ugly Truth
Rewards and Loot
- EXP
Enemies
- Dire Wolf
- Wolf
- Gorilla
- Badlands Ap
- Giant Crow
Notes
- Notes go here
The Emerald Forest Walkthrough
The Emerald Forest Main Mission Objectives
- Look for Marin Ving
- Explore the Ruins
- Leave the Jungle
- Explore the Plain
- Search the Plateau for Remains
- Leave the Valley
The Emerald Forest Walkthrough
Look for Marin Ving
The Merchant Road quest must be completed before this quest can be activated. This quest begins once the adventurers reach the Valley. Once this quest starts you will be prompted with two new tutorials.
- Tutorial- Pushing Moveable Objects: Quite often on your adventures, you will need to push moveable objects to create a path for your heroes. Jungle trees are a typical example, but you can also push rock columns, and so on. Some paths may remain impassable if you don't have the Athletics skill, or spells like Jump, Fly, or Teleport.
- Tutorial- Remote Triggers: Most of these interactable objects can be triggered from a distance by using a ranged weapon like a bow, crossbow, or even a dart. You can also use attack cantrips. Remember, though, you still have to hit your target to trigger it!
- Tutorial- Highlighting Ineractable Objects: Press and hold the ALT key to highlight various interactable objects: doors, chests, etc.
Follow the initial path. There will be a blinking marker on the HUD giving you an idea of the general direction you need to go. Follow the tutorial instructions and don't forget to check all areas for highlighted interactable objects. Try to take the path north towards the objective marker, weaving through the bushes. Crawl under the fallen log when you come across it. Be cautious since you may come across sets of traps. Destroy traps in your way and loot the sack in the bush to obtain a Staff. The further north you should be able to reach a rest sport where there will be a lootable sack with a Magnificent Shortsword. This area will be marked on your map at the River Camp. At the start of the quest, a Waypoint for the River Camp will also unlock.
From here, while moving north you should be able to hack through some foliage that will allow you to move on forward. Check your highlighted objects t find out where it is then proceed. If you continue further north, your objective marker should be showing directly east. Here is where you can cross the river. Knock down the decaying tree to create a path to cross. From this point, you will find a number of trees just like this. As you continue making your way you will give a new objective.
Explore the Ruins
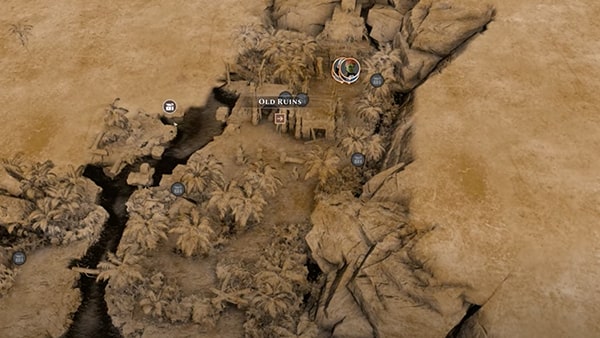
Eventually, a battle will start against some gorillas and Badland Apes unknown creatures if you happen to stumble across them. There will only be 3 at a time. The battle will trigger even at a distance. Use any long-ranged attack against the closest enemy. After tending your turn, the enemies will use their turns to approach. Continue to position your adventurers where they can attack any enemies. A few will stand back and climb the structure behind them, leaving now or two within melee range for these initial turns. Cast spells such as guiding bolt or any other ranged spell if available. As they approach they may start to group together. This is a good opportunity to cast spells that have an AoE such as Shatter. As the turns pass, you will be able to surround them and focus your melee attacks on one at a time to make sure they are cleared. Continue to focus on clearing one at a time until the area is cleared. This will complete the objective. Do not forget to loot their pelts before you leave the area and search the area for any lootable crates. Climb the ruined structure and you should be able to find x1 Scroll of Expeditious Retreat, Oil of Acuteness in a crate, and a Scroll of Comprehend Languages in another sack.
Directly north of the old ruins is a staircase leading down to a set of stone doors. Loot the corners of the pillars that stand at each side of the stairs for some additional materials. Then start to go down the stairs to begin a new secondary quest, The Underground Ruins.
Leave the Jungle
To continue with the quest head west. The objective marker should also be displayed on the HUD compass which will point you in the general direction of to head to. You may also want to proceed with caution to reveal any hidden tracks left by Marin. From this area, take your adventurers and interact with the highlighted blocks to create a platform in order to cross back over the river. You can find other materials lining the river. You may eventually reach the edge of the cliff this way lined with a few waterfalls. Rotate your camera to face the waterfall and you should be able to select a few platforms leading down in order to lead the adventurers down over the cliff to reach the lower level. Make your way all the way down. Once they are down, head south. Knock down the dead tree to create your path over the water and select the rock platform in the middle of the two waterfalls to take your party there. there will be another tree that can be knocked away from the waterfall edge, bringing you in the right direction of the objective and also completing the current objective. Continue to look out for his tracks.
Explore the Plain
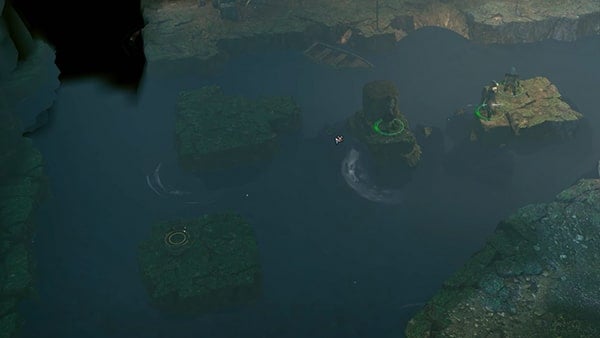
Leave the waterfall area and look out for Marin's tracks. Eventually, when you reach the river again, there will be a number of stone platforms in the middle of the river and you may be able to catch a glimpse of some torches across the river as well. Hop onto the middle platform with the block boulder to push it over. This will allow you to now reach the other side of the river. Before you cross, search all rock platforms. There will be a platform with a crate that will contain x1 Magnesium, Ammunition, and a Mace. Crossing the river will start another secondary quest, Meat Boy.
On this side of the river, you will reach a treehouse structure. This will be marked as the Outpost on your map Take the adventurers up to meet the Forge Quartermaster, Telerien Purevoice, this will advance your secondary quest, Meat Boy to the next objective. Speak to him further and ask him about the city to reveal a new destination: The City. Ending the conversation will also introduce a new Faction: The Forge.
- Tutorial- Faction, The Forge: Like the Scavengers in Crown of the Magister, the Forge will collect loot for you so you don't need to worry about carrying it. They also have magical and financial treasures from across the valley, and other unique secrets of their own, including rare recipes for crafting numerous times.
- Tutorial- Scavenger System: When you have cleared a location of monsters, go to any Forge outpost and report. They will send their people to collect any remaining loot and sell it. Each time you visit a Forge camp, you can claim the money they owe you.
They take a portion of the total value of what they brought back. You also have the chance to buy back some of the collected stuff before it is sold. Interact with the mission board near the Forge leader to use the Scavenger system.
Speak to Samko Flint just across Telerian to progress in The Missing People. After you are done looting the area and speaking to everyone from the Forge, you my head down and take a look at the cave just beside to begin The Blocked Cave. Interact with the highlight boulder to receive your first objective. Speak to Samko Flint just across Telerian to progress in The Missing People. After you are done looting the area and speaking to everyone from the Forge, you my head down and take a look at the cave just beside to begin The Blocked Cave. Interact with the highlight boulder to receive your first objective. You can now proceed to cross back over the river while pushing any boulders in your way. You will have a new location mark on your hud that will direct you to your next location. From the Blocked Cave, you should be heading Northwest. Follow the river north to eventually reach the Broken Bridge. Push the rock to create a path and then head around to push the other block. Approaching this area may trigger a battle against some Dire Wolves. During this engagement, feel free to bring your adventurers up close to these wolves to deliver more powerful melee attacks. Attacks with a large AoE will especially be beneficial in this situation as the wolves move in closer to your party. Ranged attacks can also be dealt with from the ruined wall. There will be a tile space where the adventurers can climb, which would give them a good angle over the battle area. Continue to attack those within range and try to focus on clearing them one by one with your melee adventurers and deal additional damage from a distance with your ranged adventurer. Wait for their attacks and take any attack of opportunity until all wolves and fire wolves are cleared. From here, you are also cleared to proceed up the cliffs. Take your adventures up each raised platform and then will trigger the next search objectives.
Search the Plateau for Remains
- Search the bird nests for remains.
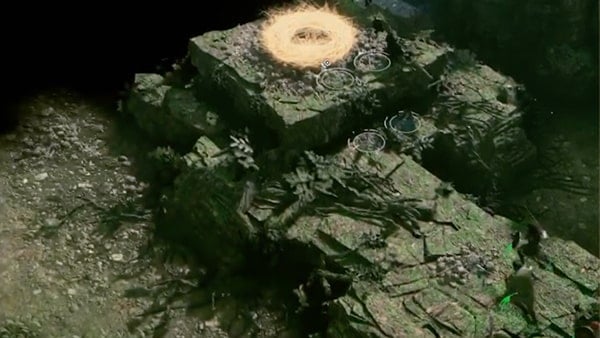
There will be three birds nest in the area. One is directly north of the climbing platforms. Be ready for a quick battle against a set of Giant crows after interacting with the first nest. once the battle begins, the crows will still be at a distance so you may have to use some ranged attacks before they approach. Clear them as they approach. You may also advance your position towards them as well to switch to your melee attacks. Focus on the closest figures and eventually, you will clear the field. This will then allow you to loot the area. Check for highlighted objects and crates and check the corners and walls for anything interactable. There should be a crate that will hold some coins, ammunition, and x1 Rough Blue Diamond.
Continue exploring the area. Head north for another birds nest. Search this one and move on to the bridge towards the west. Cross the wooden bridge to make your way to the last bird's next bird's nest and search it. There will be a crate with a Crafting Manual Warhammer of Acuteness, coins, and a bow. Another raised platform will also have a bootable corpse with a Dire Wolf Pelt, and coins. After searching the bird's nest, head north to find a travel square and this will unlock a new waypoint.
- New Waypoint added: Exit to Valley
Leave the Valley
Before you take the exit, head back south and there will be a drop point where you can take your adventures down to the lower level off the ledge. You will find a corpse here. Take the Forge Amulet. This is the item needed for The Missing Party quest. You may now make your way back to the Outpost to speak to Samko in order to complete The Missing Party. Speaking to her and returning the amulet will also begin the next quests, A Trusted Carrier and The Wolf Menace. Clearing the den of wolves up north would've automatically completed this quest.
Move on to the next area. Exit the outpost and head back north towards the exit except this time cross the river south. You can follow river from the broken bridge. The area will be circled below.
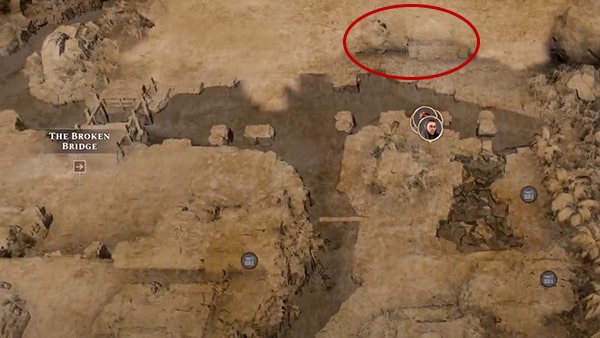
You will be greeted by a Giant named Gartok and a wooden gate. You will need a character who can communicate with the giant or a Scroll to help you such as a Scroll of Comprehend Languages. This will allow you to begin another secondary quest, A New Cushion. Follow the walls of the fort and loot the area. Search each crevice for interactable objects and make sure you check all highlighted items. There should be a crate with Splendid Plate Armor. Now you can exit the area at the new waypoint that was unlocked far north. Take your adventurers to the travel point Valley Exit. This will complete The Emerald Forest and begin Escape the Lost Valley.
General Information
- Previous: n/a
- Next: The Emerald Forest
Caer Hyfryd Map
[map]
NPCs in the Area
Secondary Quests
Forge Questline:
- The Missing Party
- Meat Boy
- The Wolf Menace
- Suspicious Ingredients
- The Messenger
- The Swamp Base
- The Dryad Queen
- Jungle Escort
- A Mysterious Place
- Meeting the Rebellion
- Manacalon Riches
- The Renewal
The People Questline:
- The Butcher
- The Bully
- Rough Diplomacy
- Tortured
- Rescuing Reya
- Raid for Rose
- Love Story
- The Prisoners
- The Palace
Mask Questline:
- A Trusted Carrier
- Secret Report
- A Small Detour
- The Conquest
- Wind of Change
- Reconnaissance
- Into the Depths
- The Tyrant
- The Escape Plan
The Rebellion Questline:
- A Simple Job
- A Thief's Work
- Shallow Grave
- Rebel Outpost
- Join the Rebellion
- Primal Threat
- The Wizard's Lair
- The Rebellion Rises
- The Dominion Strikes Back
- The Last Endeavor
Dominion Questline:
- Garden Party
- The Head Collector
- The Lost Apprentice
- Blue Blood
- Confrontation
- Under His Eyes
- Ultimate Threat
- Major Gate
Rewards and Loot
- Rewards go here
Enemies
- Dominion Soldier
- Dominion Archer
- Dominion Archanist
Notes
- Notes go here
Escape the Lost Valley Walkthrough
Escape the Lost Valley Main Mission Objectives
- Find a Way Out
Escape the Lost Valley Walkthrough
Find a Way Out
You're trapped in this valley, surrounded by armies of redeemers.
Helia Fairblade's mission to find Marin Ving seems harder than ever, but this man is still a threat to the whole Principality.
Explore the valley, talk to people, and make sense of the political situation. Make your own choices and your own alliances. and find a way back to the Principality.
Good luck and stay in the light!
Your journey to the City will immediately begin this quest after completing The Emerald Forest. Additional Secondary Quests will also be activated or affected. At this point moving forward, you will be presented with a number of new Factions. These Factions will have their own set of questlines that will need to be completed in order to gain favor with a particular faction and eventually lead to a way to escape the Lost Valley. As you explore the Valley, you may engage in a number of quests from different factions, but as you reach later parts of the questline, you can no longer remain neutral and progress in a questline without affection your relations with another. Learn about each faction through the following questlines and choose your alliances wisely.
- The Lord Protector (Mask): Enter the City to immediately begin this secondary quest.
- A Trusted Carrier: Entering the City will also fulfil an objective from the Secondary Quest, A Trusted Carrier.
Approach the stairs directly in front of the starting point to meet Rose Fairwind who will be directly above the stairs to the right. Speak to her and it will impove your relation standing with The People. This will also add a waypoint to the map
- New Waypoint Added: Market
- The Butcher (The People): After your conversation a new quest will begin with a new Objective. Ask the Butcher about Marin Ving
Follow the natural route from the city's entrance and you will find yourself at the Market where you can speak to Henrik Redhand, the Butcher. This will further progress The Butcher quest and your next objective will appear once you ask about Marin. If begun, this will also progress the quest, Meat Boy. Make your way to the nearby in so you can take a rest if needed and interact with Cafrain Shadow to begin another Sidequest.
- Secret Report (Mask): After your conversation with Cafrain Shadow, your next objective will be to meet with Cafrain's contact
Approach the Middle gate directly left of the Inn and you will encounter the City Guard who will let you through the travel portal. Continue straight till end end of the passageway till you reach the staircase to exit the high gate and enter the Palace Gate, here you will come across Malariel Brogarad. She will lead you to Orenetis. This conversation will effect or activate a few secondary quests and activate the following objectives.
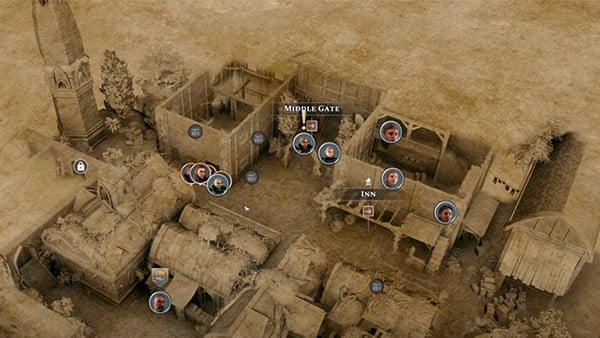
- A Simple Job (The Rebellion): Ask around for Marin Ving
- The Lord Protector: Speak to the Chancellor
After the Cutscene, you will be to roam the Throne room and the palace. Speak to Esfalad Graymas to begin another secondary quest. He will also activate a minor gate to provide a faster way out of the city. This will also unlock a new location, the harvest area. The first objective for the Garden Party quest will also be revealed. Speaking to him will also complete The Lord Protector.
- Garden Party (Dominion): Harvest Troll Tongue, Harvest Manacalon Orchid (2), Harvest Queen Ivy
- Secret Report (Mask): Speak to the City Guard in front of the gate to the left to progress in the Secret Report. You will be given a new objective. Take the Report to Cafrain
Loot the area and exit to the City. Make your way back to the inn and speak to Sima Temple. This will reveal the introduction to the Rebellion and will give you the next objective for A Simple Job. Then speak to Cafrain in the same spot as before to complete Secret Report. You will also be given a new secondary quest.
- A Small Detour (Mask): A Package from Cafrain
- Tutorial Sleight of Hand: If you area proficient with Sleight of Hand, you can attempt to pickpocket enemeis and NPCs. Also, certainermors give you disadvantage on Stealth checks. This is always risky, so think twice before trying it. You must be very stealthy to stand a chance.
- A Simple Job (The Rebellion): Steal the Middle Gate Guard's Book. Return to the middle gate and use sleight of hand on the guard with the most appropriate skills. Then return to Sima Temple to begin her next quest.
At This point, you have been introduced to all new Factions can start to form alliances. As you continue down one Faction questline you may find that you can no longer remain neutral, especially when aligning with the values of the Dominion. Progressing through certain faction questlines may result in a decrease in your relations from another Faction. You will need to progress far enough through a Faction questline before you can progress through the main campaign.
Players will need to follow a Faction questline until they reach and complete the Secret Facility area. If you follow a Faction questline, you should eventually reach one of the following quests. This will allow you to continue. Following the Mask Faction will allow you to progress without exploring the Secret Facility.
- Forge questline: The Renewal
- The People questline: The Prisoners
- The Rebellion questline: The Last Endeavor
- Dominion questline: Major Gate
View each Faction to follow their questline until you reach the Research Facility to progress in the main campaign and reach A Safe Passage.
General Information
- Previous: Escape the Lost Valley
- Next: A Safe Passage
Secret Facility Map
[map]
NPCs in the Area
Secondary Quests
- Giants questline: Ugly Truth
- The Research Complex
- Elevator
- Security Gate
- The Blue Potion (Dominion Alignment)
- The Lost Book (Dominion Alignment)
- Sabotage (Dominion Alignment)
- The Cylindrical Prism
- The Sphere Prism Key
Faction Quests
- Forge questline: The Renewal
- The People questline: The Prisoners
- The Rebellion questline: The Last Endeavor
- Dominion questline: Major Gate
Rewards
- Rewards
Enemies
- Wolf
- Mutated Tiger Drake
- Mutant Minotaur
- Mutated Dryad
- Mutated Bulette
- Dominion Soldier
- Mana Scientist
- Mana Scholar
Notes
- Notes go here
The Research Complex Walkthrough
The Research Complex Secondary Mission Objectives
-
Find a Way in
-
Search for Notes, Search for Documents, Find More information about the complex
-
Access the Underground Levels
-
Navigate the Tunnels
-
Look for Research Notes, Search for Clues, Find the Lab's Scientists
-
Enter the Dark Lab
The Research Complex Walkthrough
- Note: This quest is greatly affected by the Factions that you choose to align with when you arrive at this destination. This can make certain areas easier or harder to access by turning encounters in this area neutral or hostile. Players who enter this facility and align with the Dominion can avoid battles with Dominion soldiers and allies and may have access to additional Dominion quests in this area. Entering this area with another alignment other than the Dominion will negatively impact your relations with the Dominion. For an alternate route through this quest view The Research Complex (Alternate).
Objective
Find a Way in
Track your quest. This should lead you towards the facility to the North. Upon arrival, you will be immediately met with a fork in the path, split by a line of rocks. Take the north path and proceed with caution. Knock down the dead tree to form a path forward. Follow the cliff edge forward. You should be heading east. You may need to clear a battle against some Dominion soldiers if you are spotted once you reach the corner of the facility. If needed, clear the area and make your way to the doorway. It is possible to remain unspotted and make your way to the doorway without conflict. Continue moving east towards the marker until you reach the door. This is the main entrance of the Facility. Prepare for a battle once you open the set of doors. You will be facing a number of Dominion Soldiers and Archers that would be positioned around the area. You can take cover at the doorway and wait for each enemy to approach you and clear them as they come. Clear the area to and loot them to continue. You can choose to clear the roof as well if you wish to clear all the guards out. When you are through. you will find yourself at the inside of the Main Entrance.
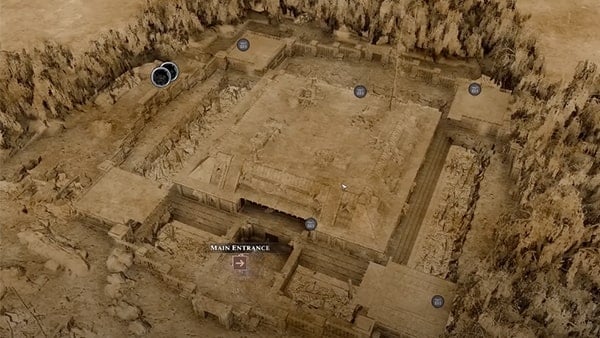
Main Entrance
Interact with the doors and the Main Entrance Waypoint will be added to your map. Interact with Praetorian who will be right behind the set of doors. They will hand you the Main Key. Once you receive the key, you can proceed through the next send of doors behind her. You will be prompted with a few new objectives.
- Search for Notes
- Search for Documents
- Find More information about the complex
At this point, you will have 3 new objective markers that will appear on your hud. In this first room, you will have a staircase that will lead to a closed gate. Remain on the same level and enter through the next set of doors. You will have three new waypoints that will be added. You will have access to the Guard Quarters, the Main Entrance and the Elevator.
Living Room
Take your adventurers to the upper level to push over the boulder on the right in order for you to clear the way. This next area will be full of Dominion Soldiers and trained wolves. Go towards the other side where the stairs are and open the gates. Make your way east through the next set of doors and you will find yourself in the Living Room. Approach with caution before on the other side of the next set of doors will be a Mana Scientist. You can quickly clear him and take a rest here where the campfire will be. Move west down the staircase and loot the area. You will find a variety of Ammunition and Crafting Scrolls.
Clear the area towards the elevator. There will be more Dominion Soldiers and wolves in this lower floor. You can either approach this from a crevice in the dining hall, or go down the staircase to the west and enter through the set of doors from the kitchen area if you can get it open. This will give you a clear way to cross towards the other platform. When you have earned your victory, move past the cells towards the very last one and interact with the switch to begin a secondary quest.
If the cell gates are open, follow the objective marker and lead your adventurers to the upper room north east. You may need to move a box in one of the cells to create a path to this location. Here you will find a set of weapon racks ont he north wall. Highlight the area and there will be document for you to observe that will inform you of the underground levels. This will complete one of your main objectives
- Completed: Find More information about the complex
Just next to the weapon rack to the right is a cube on the wall that can also be interacted with. Interact with this keyhole to begin another secondary quest.
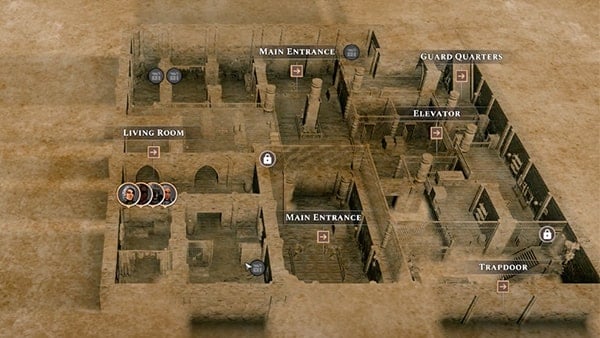
Just across this platform to the west is a set of stairs with an exit square. If you can, tap on this area and your adventurers will find a way to leap across the gap. Otherwise, move back down to the cell area. Move back across the line of cells. Take the ladder up to the platform towards the west side of the room. If you open the door here, you'll find a room for their living quarters. Loot the crate next to the door. Make your way to the set of stairs and exit the area to reach the upper floors. Prepare for battle once you reach the upper floor.
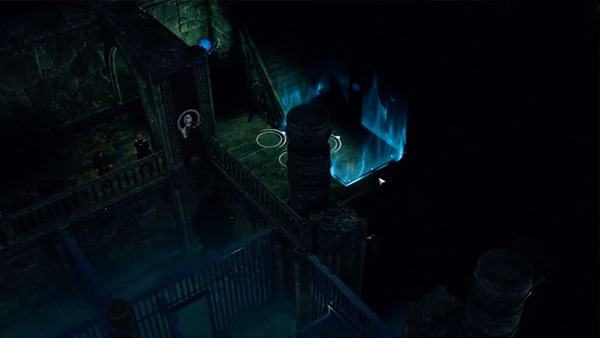
Guard Quarters
The Dominion Soldiers will start together on the upper floors. You may deal an AoE attack while they are positioned in close quarters. This will maximize the damage taken by the soldiers before they tart to disperse and approach the party. By then, you can start to pick them off as they approach. Clear them out and you are free to explore the room. Loot the key to the right of the second staircase going up. There will be an object on the box at the corner. Loot it to progress in the Elevator. This will be the key needed to use the elevator. Move up the stiars and interact with the boxes of switches then make your way down. Approach with caution to reveal any traps. Enter the cell at the southwest corner. Loot the corpse to obtain Mantle of Spell Resistance.
Test Laboratory
Move up the stairs and take the notes on the table to complete another objective.
- Completed: Search for Notes
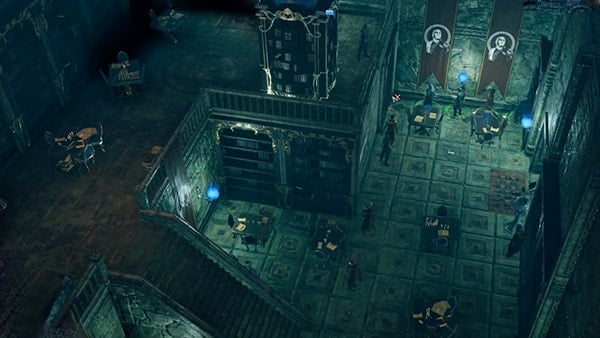
Study Room
Move towards the set of doors east and you will be met with another set of doors directly in front. This will lead to a few Mana Scientists and Scholars that will stand with 22-44 HP. Take your position and clear them. Use the walls to your advantage. Deploy an available AoE attack as they stand together. Clear them one at a time. With their low HP, this should not be an issue. Once you have cleared the room, you have found yourself in the Study Rooms. Make your way to the south room on the upper floor. From this room, enter the next room with the ladder to locate the Documents. This room can also be accessed from the roof.
- Completed: Search for Documents
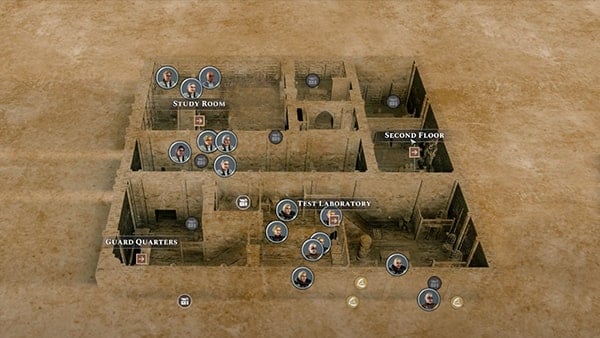
Access the Underground Levels
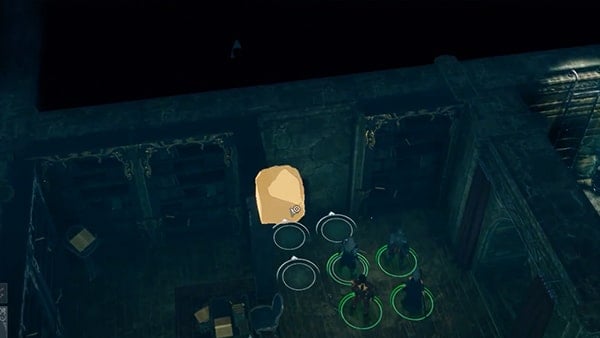
There will be an interactable bookcase that will reveal another room. This would also unlock the Second Floor Waypoint. Take the item on the desk. This will allow you to progress in the Security Gate. Search the rest of the area and you may now use this staircase to travel down. With the Elevator Key in hand, you may now make your way down to the Ungeround area. Return to the Elevator and make your way down.
Underground
Exit the elevator area. You should be facing south. Interact with the crate in front to reveal a passage to the next area east. Follow the hallway all the way tp the end until you reach a staircase. If you come across the guards as they walk by, they will begin a battle. During these initial turns, you can stand your grown and wait for the rest to approach you on the staircase. As the way starts to clear, you can bring your adventurers forward in an attempt to surround them in combat as they approach as well. Clear the way and finish he battle to be able to loot the area. Loot the area in the northroom as well fo a Magnificent Breastplate. Observe the documents on the desk in the room to potentially expand your bestiary. There will also be a campfire above the steps incase you wish to take a rest. From here reutn back to themain hallway area and there should be a gap in th fences to amek your way down to the lower level west. This is where the Dominion Banners are displayed in the center room.
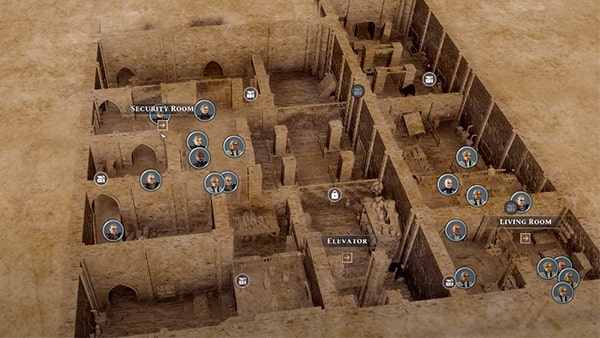
Move into the center area and use knock on any locked gates until you reach the Dominion Banners. If you proceed to the next room to the west, another battle will begin. Clear them starting with those close to you. Some of them will have HP as well as 5. Reutrn to the campfire area. Take a rest if needed. This time explore the area directly south. You'll find yourself in a dining area. Loot the table on the north side to obtain the Cylinder Prism Key.
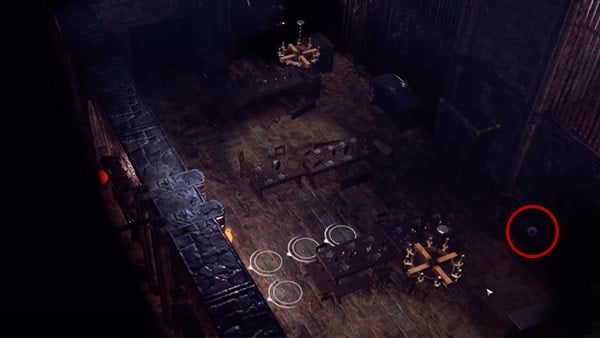
Take the stairs to move on to the next hall and open the doors to the east. There will be a switch on the wall at the south west corner of the room. This will begin the secondary quest for the key you obtained.
Return back into the Security Room and take the doors south.
Navigate the Tunnels
This will lead you into the tunnels. Approach with caution. Continue south till you reach a tunnel that branches west. You will find yourself in the southern section. Use your skills to disable the traps in this areand continue south. You will soon be met with another battle, this time with Mutated creatures. Clear them them head back and take the tunnel west. Disable the trap before you proceed.
As you continue down this tunnel, another set of enemies will meet you here and you will have to clear another battle.Your main focus will be on the Mutant Minotaur who will stand at 142 HP. The other Muntant creature in the area is a Mutant Tiget Drake with only 39 HP, which will be mushc easier to clear once it comes in range.
If you continue north, you will clear the way back to the main rooms where the Elevator was. The tunnels can also be accessed from the main area by clearing the barricade that was put in place on the other side.
Enter the tunnels and reach the crossroads. There will be a switch just to the right of the gate tp the south. Loot the corpse. It will have a Cube Prism Key needed for the Security gate. Reach the next section and you will be facing some Mutant Tiger Drakes and Mutated Dryad enemies again. Advance in this area to unlock the Northern Section. Return to the second cross path and take the tunnel east. Interact with the wall at the end of the tunnel to get through to the next area.
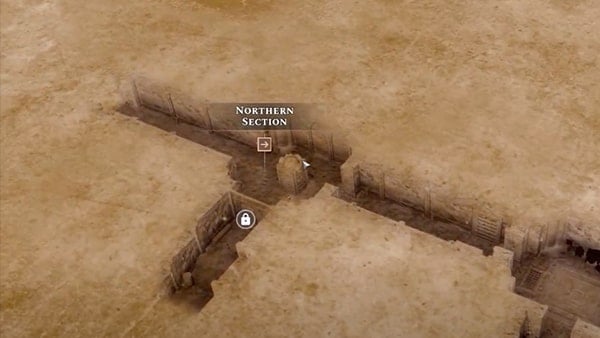
Interact with the switch on the right of the wall to reveal the next area and begin another battle with more mutated test subjects. Loot the area and then take the tunnel and continue south. Ctoneinue this way with caution. Disable the traps in your way and once you reach a wall towards the south, take the tunnel east. This will take you out of the tunnel and you will be given three more objectives.
Look for Research Notes
Search for Clues
Find the Lab's Scientists
You will need to face another battle here against the mutated subjects. When they are cleared, enter through the next doorway north to reach the row of cells.
Captive Quarters
- Search for Clues.
Click the area to allow your adventurers to find their way here. Loot the sack in the middle of the room, and this will complete the objective 'search for clues'. Entering this area will also progress in the giant's secondary quest, the Ugly Truth if it has been activated. Open the cell doors to increase your relations with The People.
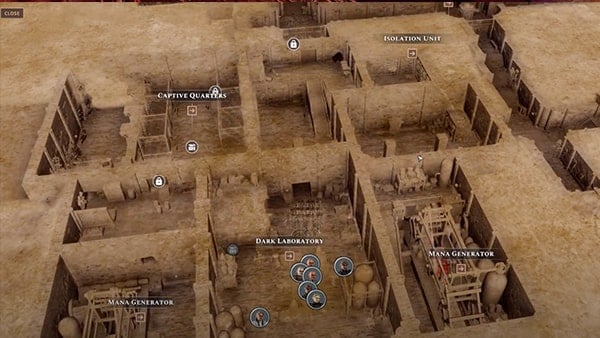
Travel North. This room will have the Dominion Banner in the center. Take the stairs up and enter the doors to the side. There will be a sphere hole on the wall that will be highlighted. Interact with it to complete The Sphere Prism Key.
Head back down. If you approach with caution, the tracks will lead you to the east but will trigger the battle. Instead, take the doors north and north again to fill in the map. Return to the cell areas. There will be a platform above the cells that you can reach. Click there and your characters will find a way to the upper platform. Facing east, pushover the box. To the right of that will be another boulder to push over, and a box in front to shove aside as well. Thsi will reveal a hole to the next area, the lab. Push the next boulder in the wall at the east side of the room and you will find yourself at the , Mana Generator.
Dark Laboratory
There will be one door going north here. Prepare for battle. This will bring you to the Dark Laboratory and will immediately bring you into into conflict. The Dark Laboratory will be added as was waypoint. You would've also found the. Clear them to earn a victory and this will also progress The Prisoners. You will be facing more guards and Mana Scholars in this area. Afterwards, you are free to interact with Sitenero in the last cell.This would further progress in The People Faction quest, The Prisoners. At this point, all your objectives in this location would be complete.
Look for Research Notes: You have found some research notes on mutant experients!
Search for Clues: You learn that some of the mutants escaped!
Find the Lab's Scientists: You found tracks leading to a locked door.
If following the Forge questline, do not leave the location yet and continue below.
Exit the Complex
Find your way out of the building and exit the location through the main entrance to trigger a cutscene.
The Renewal
From the Dark Laboratory, you will find yourself in between the two Mana Generator Rooms.
Mana Generator
In the Blue Mana Generator Room, interact with the large switch in the center of the room and you will find that the generator won't work. This will also give you a Mana Generator Fragment. Take the north doors in the area to unlock the waypoint: Dark Laboratory.
Dark Laboratory
Before you leave, you may loot the area. The chest here will be equipped with a trap. Take the highlighted object on the table to gain a Pyramid Prism Key. Loot the box near the cells towards the east and gain the missing part to the Major Gate, the Major Gate Fragment.
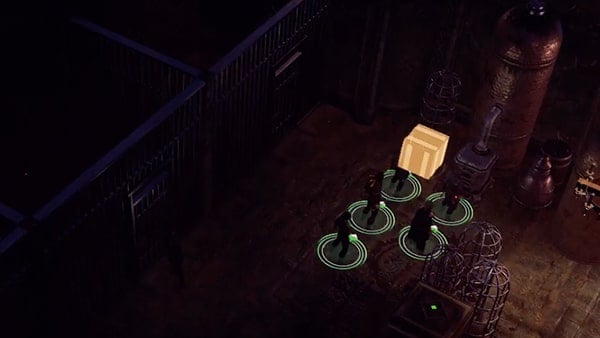
When you are done, move the boulder blocking the west door aside to unblock the doors to the laboratory. This will complete The Sphere Prism Key. Remain in the room and open the doors on the north wall instead to add another Mana Generator Waypoint. Interact with the generator and they will say it won't work, but since you have the Mana Generator Fragment, interact with it a second time and that will fix it. This is required for the Dominion secondary quest, Major Gate or The Renewal from the Forge. Take the stairs in the same room and flip the large switch box to switch it on.
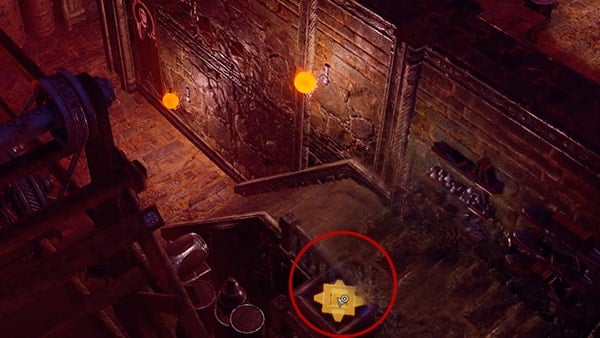
Once the Mana Generators are activated, you may now leave the complex and report to Hasdrubal at the Swamp (Location) to complete The Renewal for the Forge.
General Information
- Previous: n/a
- Next: The Emerald Forest
Prologue Map
[map]
NPCs in the Area
- Vando Klarn (Mask questline)
Bosses
- n/a
Rewards
- Rewards
Enemies
- Enemies
Notes
- Notes go here
A Safe Passage Walkthrough
A Safe Passage Main Mission Objectives
- Return to the Marshes
A Safe Passage Walkthrough
Return to the Marshes
You must have completed the questline of one of the Factions to activate this quest. The quest is immediately started upon the completion of one the following quests.
- Forge questline: The Renewal
- The People questline: The Palace
- Dominion questline: Major Gate
- The Rebellion questline: The Last Endeavor
- Mask questline: The Escape Plan
This means you would have access to Orenetis's Scepter.
Return to the Marshes
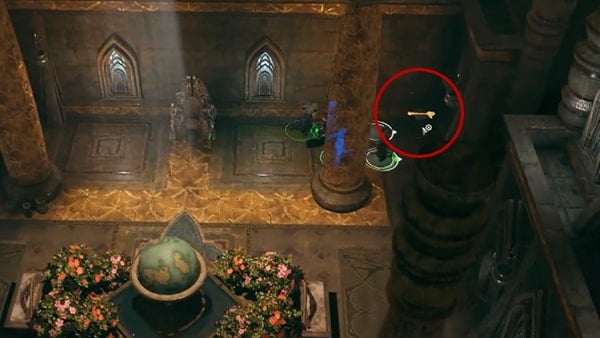
With the scepter, you can finally leave the area. From the throne room, there will be a newly revealed hall just behind a pillar to the west. Enter it to unlock the Secret Entrance Waypoint. Highlight the area. Interact with the switch on the wall in the center of the room. This will take you back outside. You can continue to take the exits, then you can finally leave Caer Hyfryd.
Travel to the Merchant's Campsite. If revealed, use your map to make your way to these exit points and use them. First, travel to the Redeemers' Nest waypoint. Get through this area to the ruin entrance, then reach the Abandoned campsite and use the Grotto exit. This will reveal the final cutscene and the ending.
