The Research Complex |
|
|---|---|
| Type | Secondary Quest |
| Act | Lost Valley DLC |
| Location | Secret Facility |
| Reward(s) | ??? |
The Research Complex is a Secondary Quest from the Lost Valley DLC in Solasta: Crown of the Magister. Quests are different tasks and missions that a player can acquire and partake in throughout the game, quests are usually unlocked through the main campaign, during a series of events, or are given by certain NPCs. Completing a quest also grants various rewards that can aid the player throughout their journey. Depending on which questline you follow to reach The Secret Facility will affect your standing with the Factions. This will also affect your progress route through this quest. For an alternate route through this quest view The Research Complex (Alternate).
The Research Complex Objectives
Find a Way in
Search for Notes, Search for Documents, Find More information about the complex
Access the Underground Levels
Navigate the Tunnels
Look for Research Notes, Search for Clues, Find the Lab's Scientists
Enter the Dark Lab
The Research Complex Walkthrough
Progress through the main questline in the Lost Valley DLC until you unlock the Secret Facility. This can be done by following a specific questline. Your loyalty will affect how you progress through this questline. Follow a faction questline or the giant's questline and reach the following quests to unlock the secret facility. This will be located southwest of the Swamp (Location).
- Forge questline: The Renewal
- The People questline: The Prisoners
- The Rebellion questline: The Last Endeavor
- Dominion questline: Major Gate
- Giants questline: Ugly Truth
Travel to the Secret Facility from the map and this quest will immediately begin. This walkthrough is best played with the alignment if the Dominion Questline. This quest is greatly affected by the Factions that you choose to align with when you arrive at this destination. This can make certain areas easier or harder to access by turning encounters in this area neutral or hostile. Players who enter this facility and align with the Dominion can avoid battles with Dominion soldiers and allies and may have access to additional Dominion quests in this area. Entering this area with another alignment other than the Dominion will negatively impact your relations with the Dominion.
Find a Way in
Track your quest in order to have a location marker appear on hud compass. This should lead you towards the facility to the southeast. Upon arrival, you will be immediately met with a fork in the path, split by a line of rocks. Take the right path to take you in the direction of the marker. Push the boulder over in order to make your way through the narrow path. Continue taking the path down to the right, taking you south. There should be an opening between the rocks, moving you back north towards the facility. You should be met with a set of doors. This is the Facility's main entrance.
Main Entrance
Interact with the doors and the Main Entrance Waypoint will be added to your map. Interact with Praetorian who will be right behind the set of doors. They will hand you the Main Key. Once you receive the key, you can proceed through the next send of doors behind her. You will be prompted with a few new objectives.
- Search for Notes: On a desk in the Test Laboratory
- Search for Documents: On a desk south of the Study Room
- Find More information about the complex: Locate and use the crystal key on the elevators to descend to the underground levels.
At this point, you will have 3 new objective markers that will appear on your hud. In this first room, you will have a staircase that will lead to a closed gate. Remain on the same level and enter through the next set of doors. You will have three new waypoints that will be added. You will have access to the Guard Quarters, the Main Entrance and the Elevator.
Guard Quarters
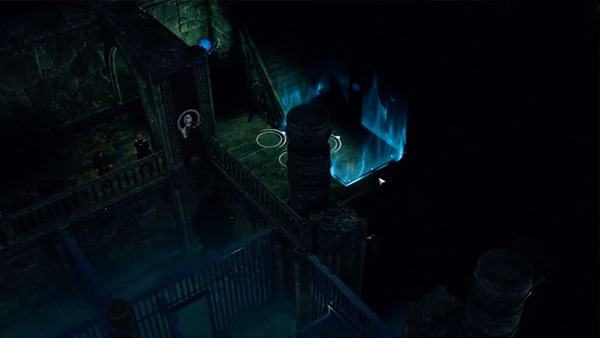
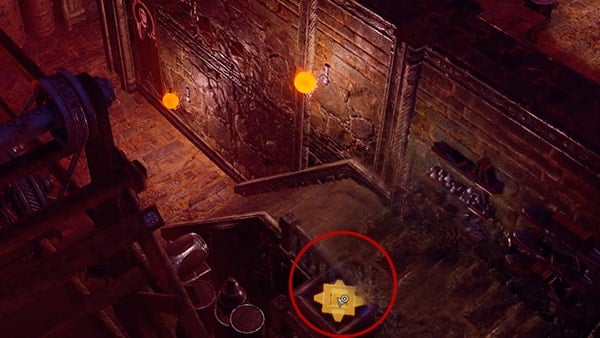
Scroll North to find another set of stairs with an exit square. Take your adventurers to this exit and this will take you to the Guard Quarters on the second floor. Loot the area. At the south corner of this upper floor there will be an item for you to take which will begin another secondary quest, Elevator. This is the Pyramid Prism Key required for the second quest. It will be on top of a box found next to the sack and barrel in the same corner. There will also be a sack positioned at the center of this wall with a Metallic Headband and a number of hatchets.
At the east corner, you can also loot the Weapons Rack which will contain Greatsword +1, and other weapons and Armor. There will also be a set of doors next to it. Go through this set of doors and continue through the next set of doors directly in front. This will bring you to the Study Room
Study Room
Loot this area. You can find a number of Scrolls by looting the bookshelves. Loot the first floor. When you're done with this floor, take the stairs up and examine the documents in this area. You may gain more information for your bestiary. Interact with the Mana Scholar in this area to begin another secondary quest, The Lost Book.
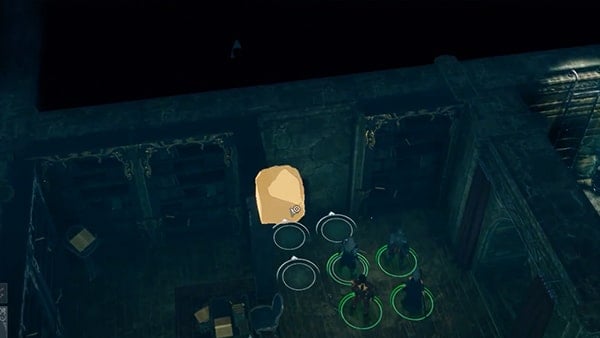
Open the next set of doors in this room and loot the chest. In this area, interact with the bookcase while facing directly south. It will reveal the boulder behind it which you can push through to unlock a new waypoint: Second Floor. You will find a note on the bookshelf " Access to the tunnels is currently blocked. Use the elevator if you need to reach the lower levels." Loot the chest next to it and search the desk to start and complete one objective for a new secondary quest.
Move towards the next area directly west. There will be another exit point to go down the stairs. This will unlock a new waypoint: Living room.
Living Room
Highlight this area to reveal a door towards the north of this room. Enter through these next set of doors and you will find the Mana Scientist. You can loot the area he is in for a few Scrolls and a Mace. Speak to him to gain a new secondary quest: The Blue Potion.
Search the area including the rooms towards the west. To locate the Blue Potion, return back through the archway from where you interacted with the Mana Scientist to the west and go back down the stairs the Blue Potion can be obtained here. This will room will look like a kitchen. Highlight the objects in the room and loot it from the table. Return the Potion to the Scientist to complete the secondary quest.
Before heading back back through exit point to get up the stairs. This time take the doors north to enter the hall just outside the Study Room. Move down the hall north and take the last doorway to the west. Move all the way forward till you reach the travel point and a staircase. Move up the staircase and enter through the bar gates. This will bring you into the Test Laboratory and will be added as a waypoint.
Test Laboratory
- Search for Notes
This room will be full of Dominion Soldiers, but should leave you unharmed if you are aligned with the Dominion Faction. The desk on the east side of the area will have the notes needed for your main objective. There area also two boxes with lit switches on them in this room. These switches control the cage doors in the area below.
Move all the way south and approach with caution to reveal any traps. The cell on the southwest corner will have a set of traps and a corpse to loot with a Magnificent Staff, Crossbow bolt x3. Return to the staircase going down and there will be a now accessible room directly north with a cell and a ladder in it. Interact with the desk to obtain the documents needed for your quest.
Access the Underground Levels
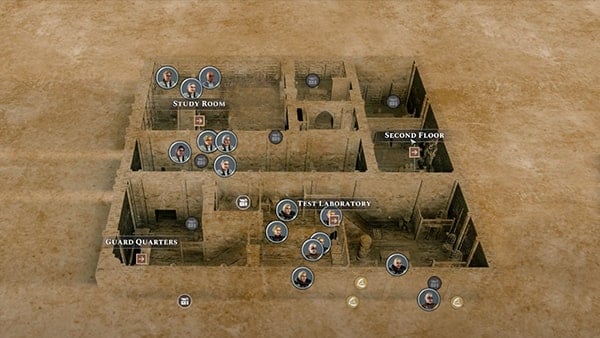
Travel to the Second Floor Staircase to return back into the living room. Make your way to down the staircase north. Highlight the area to reveal any secret doorways that are hidden. Use Knock to get through. There will be a Guard Trainer pacing this area. There will also be a number of wolves who will remain friendly if you are in good relations with the Dominon. Loot the area and continue north past the cells and the last cell at the end will have a switch to interact with. This is where you can use the crystal key. Interact with it to complete the Elevator Quest and gain access to the Underground Levels. Using this elevator will also complete the objective to find more information about the complex.
Explore
You will be tasked to explore the underground area. Explore and loot the area. According to your objective marker on your compass hud, from here, you need to make your way south, Take the doors in this room east. You may need to cast Knock to get through. Follow the rooms east till you reach a stair case. From here, pass through the arch north and loot the crate. Thre will be another set of stairs here, head to the upper floor and loot this area as well. The Weapons rack will contain coins, Large Belt, Magnificent Plate Armor and a Sword. There will also be a campfire in this room so take a rest if needed. When yo are done with area continue back to the hallway and go through the arch south. This will add a new Waypoint, Security Room. This will also begin a new objective.
Leave the Facility
Security Room
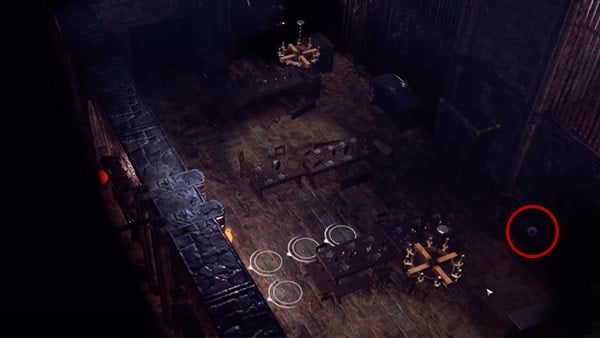
Continue exploring the area and filling the map. Go south through the dining area. Loot the item on the long table placed towards the wall to obtain Cylinder Prism Key. From the dining hall take the doors east and there will be a wall with bars. Get through the gate to head north. This next room will have four banners and from here, you will need to take the doors west. This is where you will meet another Mana Scientist where another secondary quest will begin.
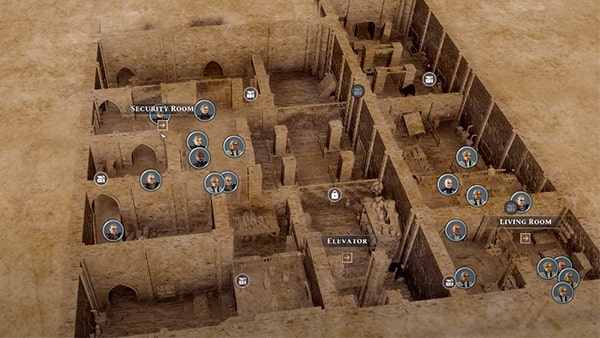
Take the staircase behind him north. Library will have some Crafting manuals for you to read. When you're done continue north loot the area. Return to the room with the Mana Scientist. There will be a ladder and a platform in the southeast corner of the room. The room directly south should also still be undiscovered. Take the platform to the room south, or click on this next room and your adventurers will find their way here. This will trigger a short cutscene. Loot this area and approach the barricaded door. Start removing the barricade one by one starting will the boulder at the very front. When the doors are cleared, open it and approach with caution to reveal the traps in the area. As you move past the traps, the next objective will begin. Continue with caution.
Navigate the Tunnels
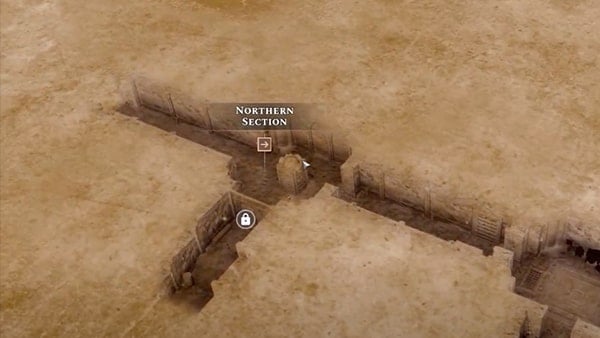
Northern Section
Continue forward down this hall and a new waypoint, Northern Section. If you continue forward, you will begin a battle. While you are here, you can attack the creatures you see first to get the first attack in. You can do this while keeping some of your characters hidden. You will be facing a Mutant Minotaur and a Mutant Tiger Drake. Clear the Drake who will only have 39 HP and you can focus solely on the Minotaur who will stand at 142 HP. Since the area is so small, you can stand your ground and continue to bombard it with your ranged attacks. There is a trap directly in front if you didn't step in too far. If you didn't approach past it, it will take a turn to pass the trap and take some damage and you can continue to attack until his hp is depleted. Clear the last trap and continue to be cautious. Highlight the area to find the interactable keyhole on the wall. Interact with it to begin a new quest
You may need to return to the last campfire back at the Security Room to take another rest. Back at the northern section, continue down the tunnel till they are split, and proceed with caution. Take the west tunnel and prepare to face a battle. Journey deep enough to unlock a new waypoint, Test Subject Arena.
Test Subject Arena
Remain on the upper platform. Before you approach, observe the mutant's position and deal an AoE attack if available, if not, use any ranged attack to deal with the first move. You should be able to clear the Mutated Tiger Drake first then catch the others by surprise with this approach. You will have a Mutated Bulette that will have 157 HP and a Mutated Dryad with 84 HP. Another option is to deploy a summon to approach the arena and gain a better positioning without compromising your adventurer's higher ground. Clear them to continue. You may then explore the arena and loot the corpse to obtain the Sphere Prism Key, coins, Magnificent Shield, Scroll.
Return to the upper floor tunnel and if you continue to the locked gate north, you will encounter the new waypoint: Major Gate Room. This will also begin a new secondary quest.
Since you have obtained the Key from the corpse, the first objective of The Sphere Prism Key will immediately be checked off. Enter this Gate to activate the quest. Enter the area to trigger a short cutscene. Follow the hallway east.
Major Gate Room
Interact with the Major Gate and it will complete an objective from the Major Gate Quest. Take the east hallway and use the switch. This will also complete The Security Gate if you haven't already. Past this gate is another with a switch towards the east. Use the Cylinder Prism Key here to complete The Cylindrical Prism.
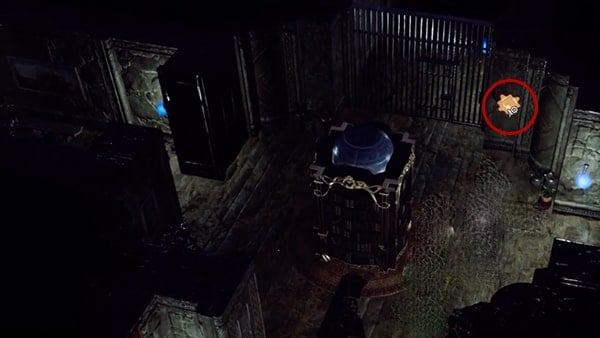
Once this gate is open, be cautious when entering the next area. You will be met with a battle that you will need to complete down the narrow hall. You will be facing a number of Mutant Tiger Drakes and a couple of Mutated Dryad enemies. You may keep your positions to allow them to approach. While they are condensed in this narrow area, deploy your AoE attacks if available.
Once it is clear, follow the tunnels south and you will find your way to the Dark Lab. This will progress your Sabotage quest. In this location, you will be given three more objectives
Look for Research Notes
Search for Clues
Find the Lab's Scientists
Dark Lab
- Find the Lab's Scientists
Tracking this quest will reveal two markers to the south of this location and one to the north on the compass. Take the doors south. Be prepared for a battle against more mutants. This set will be fairly larger and will consist of a mutated Dire Wolf, Troll, and a Minotaur. Your largest threat here will be the Mutated Minotaur who will stand at 12 HP. As they enter, deal an AoE attack if available while they stand together. As the turns go by they will approach o you can use the doorway to your advantage by narrowing their approach. By keeping your position near the wall, they are forced to approach one at a time and this will allow only one of them to ake a position near you. Keep in mind that during their turns, they will have the ability to restore some health. This is sometimes prevented when the enemy receives fire damage. Continue to deal ranged attacks with fire damage if possible and wait for them to approach the party at the doorway. Then focus your melee attacks at the closest enemy. If you can, clear out the enemies in the immediate area first in order to minimize damage intake. While you are pinned to your position, you may consider deploying a summon to gain a different position. Clear the area to continue.
Captive Quarters
Loot this location, then attempt to take the doors east. A new waypoint will be added: Captive Quarters, but you will be unable to enter. This will check off one of your three main objectives, Find the Lab's Scientists. Interact with the switch directly right of the doors, but something will be blocking the doors. This will also complete an objective for the secondary quest, The Sphere Prism Key.
- Look for Research Notes
Continue to explore the area with caution and you may spot some tracks in this location. Take the staircase towards the west. Once up the stairs, go north and interact with the switch on the wall to open the set of doors here. This will give you the Isolation Unit. Loot the notes on the desk to obtain the research notes needed for your objective. Move on to the next area.
- Search for Clues.
Scroll all the way south, there will be an undiscovered room with cells. Click the area to allow your adventurers to find their way here. This will complete the last objective of the three, search for clues. Entering this area will also progress in the giant's secondary quest, the Ugly Truth if it has been activated.
Enter the Dark Lab
Loot the basket in the middle of the room to begin a quick cutscene. After the scene ends, look at the room on the other side of the wall here to the east. Click into this area and your party will find a way to climb the wall. Look south and have them push over the boulder and the box. The box will allow you to climb over to the next area east. This will complete another objective for the secondary quest, The Sphere Prism Key.
There will be another crate that can be pushed aside in this room at the eastern wall. Pushing the crate will reveal another boulder that can also be moved. Move the boulder to add the waypoint: Mana Generator.
Mana Generator
Interact with the large switch in the center of the room and you will find that the generator won't work. This will also give you a Mana Generator Fragment. Take the north doors in the area to unlock the waypoint: Dark Laboratory.
Exit the Complex
Dark Laboratory
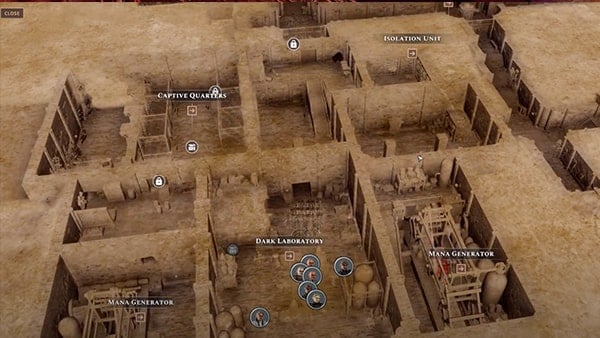
Before you leave, you may loot the area. The chest here will be equipped with a trap. Take the highlighted object on the table to gain a Pyramid Prism Key. This is a duplicate of the one earlier obtained in the Guard Quarters area in case it was missed; used to activate the Elevator. Loot the box near the cells towards the east and gain the missing part to the Major Gate, the Major Gate Fragment.
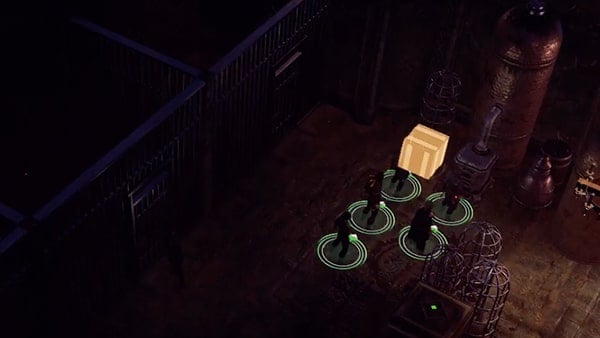
When you are done, move the boulder blocking the west door aside. This will complete The Sphere Prism Key. Remain in the room and open the doors on the north wall instead to add another Mana Generator Waypoint. Interact with the generator and they will say it won't work, but since you have the Mana Generator Fragment, interact with it a second time and that will fix it. This is required for the Dominion secondary quest, Major Gate. Take the stairs in the same room and flip the large switch box to switch it on.
Before you leave the Dark Laboratory, interact with Sitenero who is standing in a cell in the area. You will have a decision to make that would affect your relations with The Rebellion and Mask Factions. Deciding anything but to kill him will fail or forfeit all currently active quests from either of these Factions.
Mana Generator
Use the Mana Generator Fragment on the other Mana Generator and switch it on. You can then return to the Major Gate from the map with the missing piece. Interact with it to Repair the Major Gate. Interact with the Major Gate to return to Orenetis and trigger a cutscene. This will take you out of the complex and complete the quest.
How to obtain The Research Complex
- Purchase and download the Lost Valley DLC in order to be able to access this quest. Progress through the main questline, and through a desired Faction questline until you unlock the Secret Facility.
The Research Complex Rewards and Loot
- ???
- ???
The Research Complex Notes & Tips
- Notes & tips go here
